Open the standalone activator: Control Center toolbar → Standalone Activator → choose New Interface (recommended) or Classic Interface
If you prefer not to use the standalone activator, you can also use the latest standalone control center screen mirroring system to prepare the self-activation environment
VPN preparation
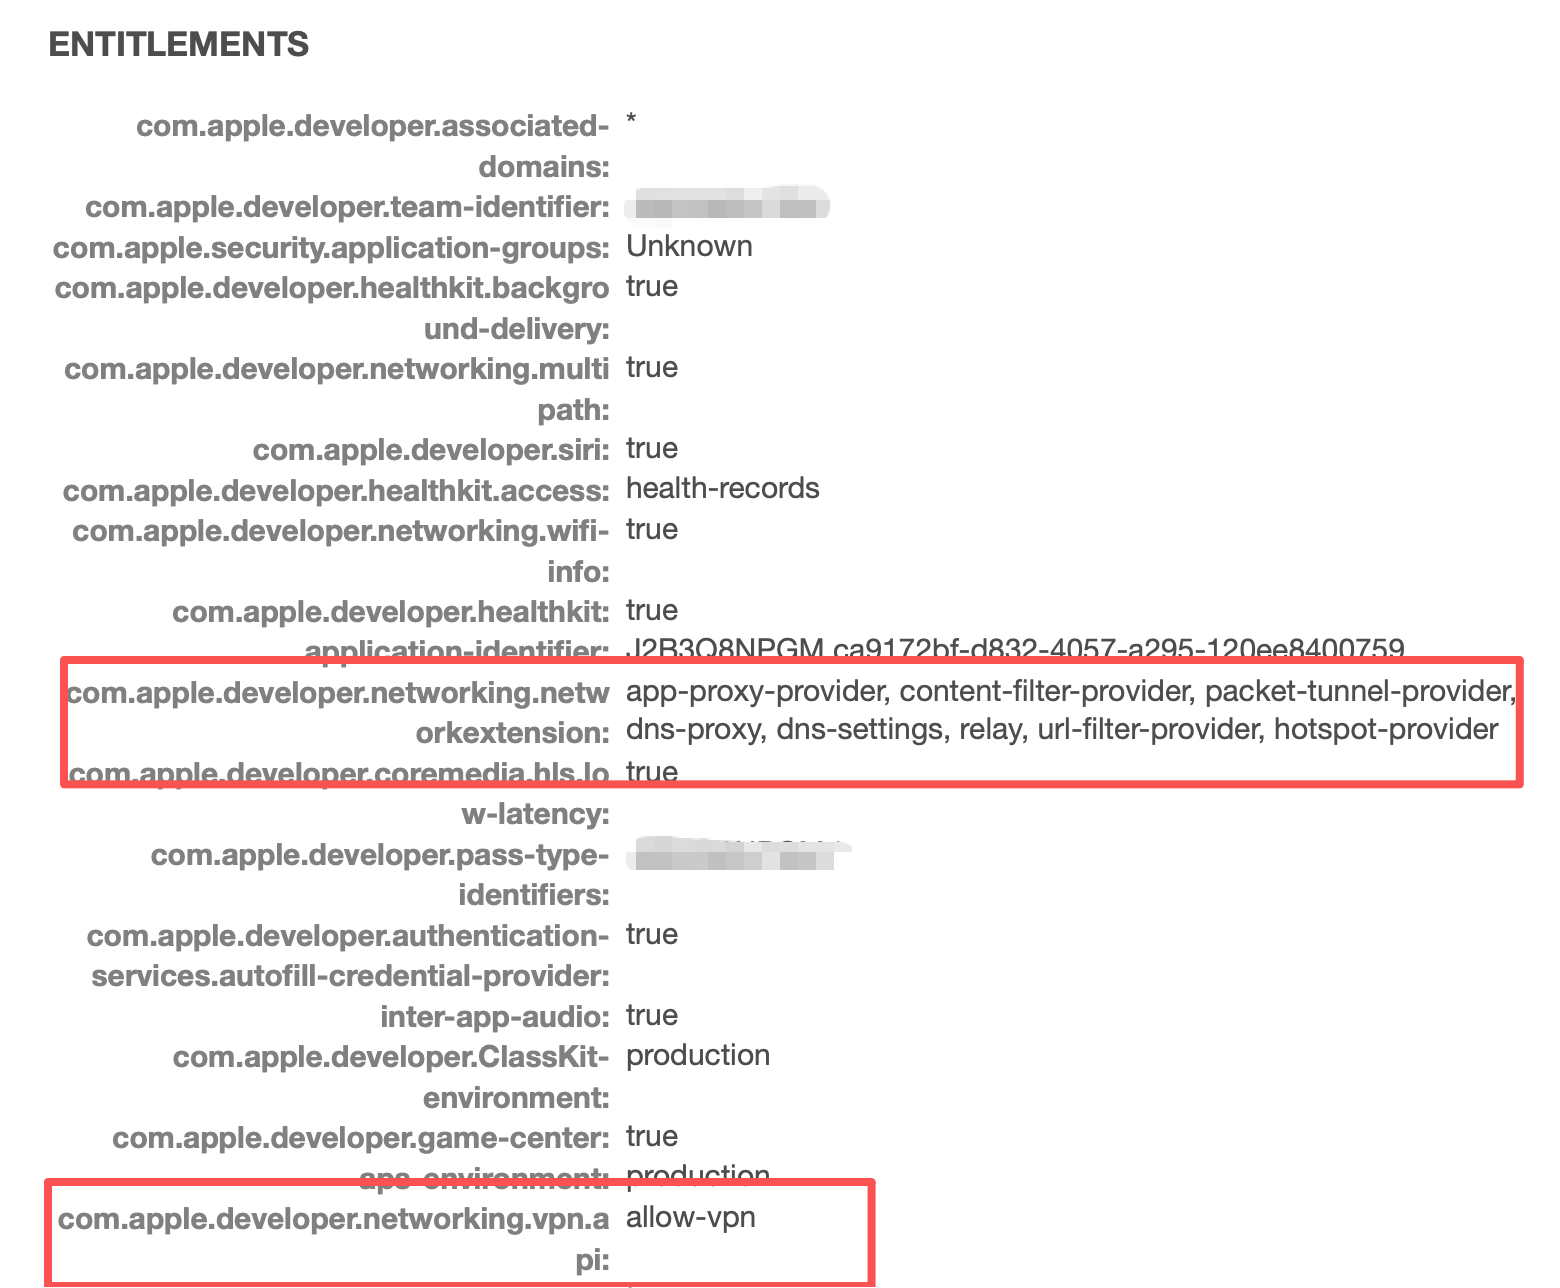
If the signed mobileprovision profile includes [com.apple.developer.networking.networkextension]
and [com.apple.developer.networking.vpn.api], you can skip downloading the LocalDevVpn app
See below
If the signing profile lacks these entitlements, download LocalDevVpn from the App Store with a US Apple ID. US accounts can be bought on Xianyu or search online for registration guides
Main app is open, licensed, and initialized! (See activator tutorial for initialization). User info in main app Settings must have data
For packaged main apps, go to main app Settings → bottom section Other Settings → enable debug service. Debug builds enable debug service automatically
Connect the phone via USB. The first time generating a pairing file, the phone needs a passcode; otherwise it may fail. You can remove the passcode afterward
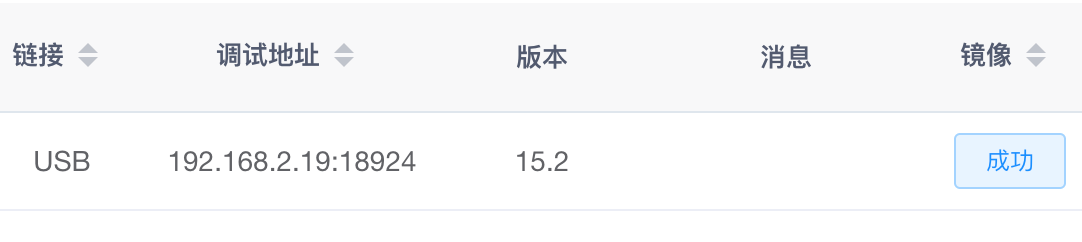
Open the standalone activator (Control Center → Standalone Activator → New Interface). Connected phones are listed with connection type USB and Success in the Image column
You can also open the activator page in a browser (classic interface)
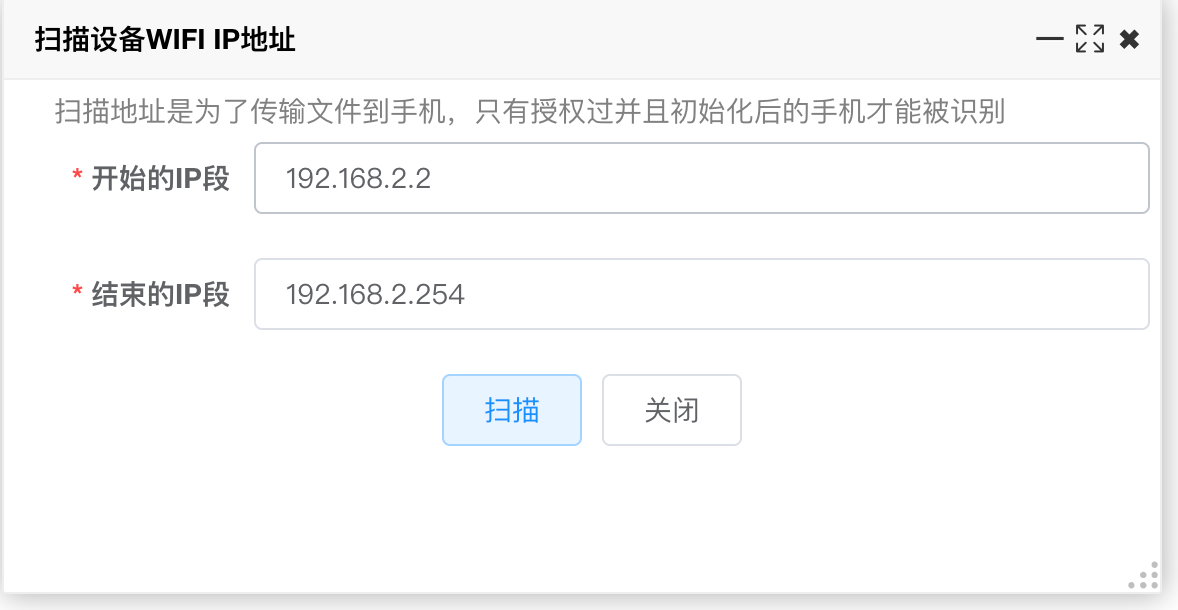
With main app debug service enabled, click Batch Self-Activation → Scan Device IP Addresses. Results appear in the Debug Address column
For packaged apps, enable debug service under app Settings → Other Settings, otherwise scanning may fail. Initialization and licensing are required
Click Batch Self-Activation → One-Click Complete Self-Activation Environment. The system auto-generates pairing certificates and pushes required files to the phone
This may trigger a trust dialog on the phone — tap Trust if shown. Retry if it fails
Developer image must be flashed successfully before this step
After setup, click Batch Self-Activation → Self-Activation Test (internal or external VPN). External VPN opens LocalDevVpn; results appear on the page
Other Features
Scan device IP — scan upload file addresses
Batch generate pairing files — generate trust pairing files for the phone; must push to phone before use
Batch push pairing files — push device pairing files to the phone
Batch push image files — push image files to the phone
Self-activation test (external LocalDevVpn) — test self-activation with external VPN app
Self-activation test (internal VPN) — test self-activation with internal VPN
Try the above features as needed
Main App Self-Activation Settings
Main app Settings also supports self-activation testing and VPN operations
FAQ
Push pairing file does not exist — click Batch Self-Activation → Batch Generate Pairing Files to regenerate
Push image file says file not found — configure image files and flash successfully first. See Configure Developer Image
Self-activation says environment not ready
WiFi debug must be on — use activator WiFi Debug → Enable WiFi Debug
Pairing certificate wrong or expired — generate and upload pairing certificate via Batch Self-Activation → Batch Generate Pairing Files
VPN not working — first VPN open may prompt on phone; allow it
Force-quit main app or reboot phone and retry self-activation
Phone must be on WiFi; mobile network does not work
Self-activation succeeded but agent IPA won’t open
Likely an agent IPA issue; try flashing image from PC and test again
Cannot generate pairing file
Phone passcode is required to generate pairing files
Debug main app IPA won’t install after signing
Package a debug build from IDEA; it auto-updates bundleId-related values, then sign and install again