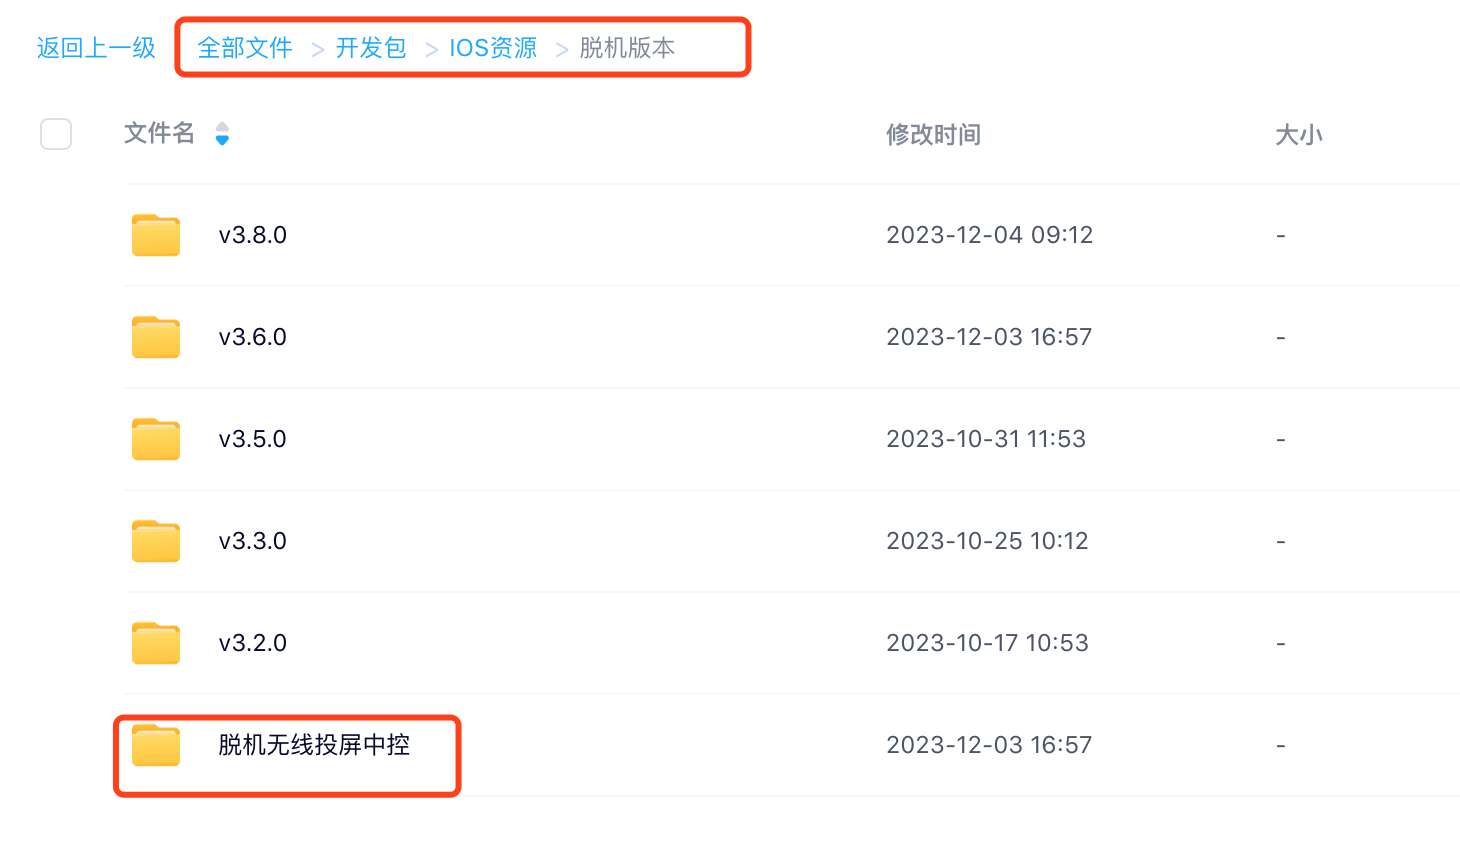
In the cloud drive, go to Development Pack → iOS Resources → Standalone Version → Standalone Wireless Screen Mirroring Control Center, and download the compressed folder for your version
After downloading, extract the archive. iostjscreen.exe is the screen mirroring program and iostjcenter.exe is the control center program — launch whichever you need
Proxy Mode Screen Mirroring and Control
Install Main App and Agent IPA
In the cloud drive, go to Development Pack → iOS Resources → Standalone Version, and download the main IPA (starting with easyclick-tj-main) and agent app (starting with easyclick-tj-agent) above v3.8.0
You can download the latest version by version number from the cloud drive
You can also build the main app with the development plugin for a customized IPA
The agent app does not support free Apple ID signing; the main app does. After signing, install to your phone with i4Tools or another installer
For signing issues, ask a signing provider in the group, use your own P12 certificate, or search the forum for tools like Bullfrog Sign or EasySign
In proxy mode, install all IPAs and complete authorization, then tap the agent IPA to start automation
When startup succeeds, Automating Running appears on the phone. Then proceed to Device Authorization & Screen Mirroring Authorization, Scan Devices, and Screen Mirroring Operations
After installing the main app, go to App Settings → Keep-Alive Settings, check all three options, then Save Settings to ensure the floating window appears and the app stays active
Screen Recording + OTG/BLE Screen Mirroring
Install Main App IPA
In the cloud drive, go to Development Pack → iOS Resources → Standalone Version, and download the latest main app (starting with easyclick-tj-main) by version number
You can also build the main app with the development plugin for a customized IPA
Sign and install with TrollStore, Sideloadly, Bullfrog Sign, EasySign, or similar tools
Or purchase signing services from Taobao, etc.
After installing the main app, go to App Settings → Keep-Alive Settings, check all three options, then Save Settings to ensure the floating window appears and the app stays active
OTG and BLE Hardware Setup
OTG is recommended because it requires less configuration
After flashing both firmware types, connecting to the phone, and confirming Test HOME works, proceed to the next step
OTG/BLE Screen Mirroring Shortcut Binding
Because screen-recording mode triggers a system confirmation dialog, this step automates tapping that dialog
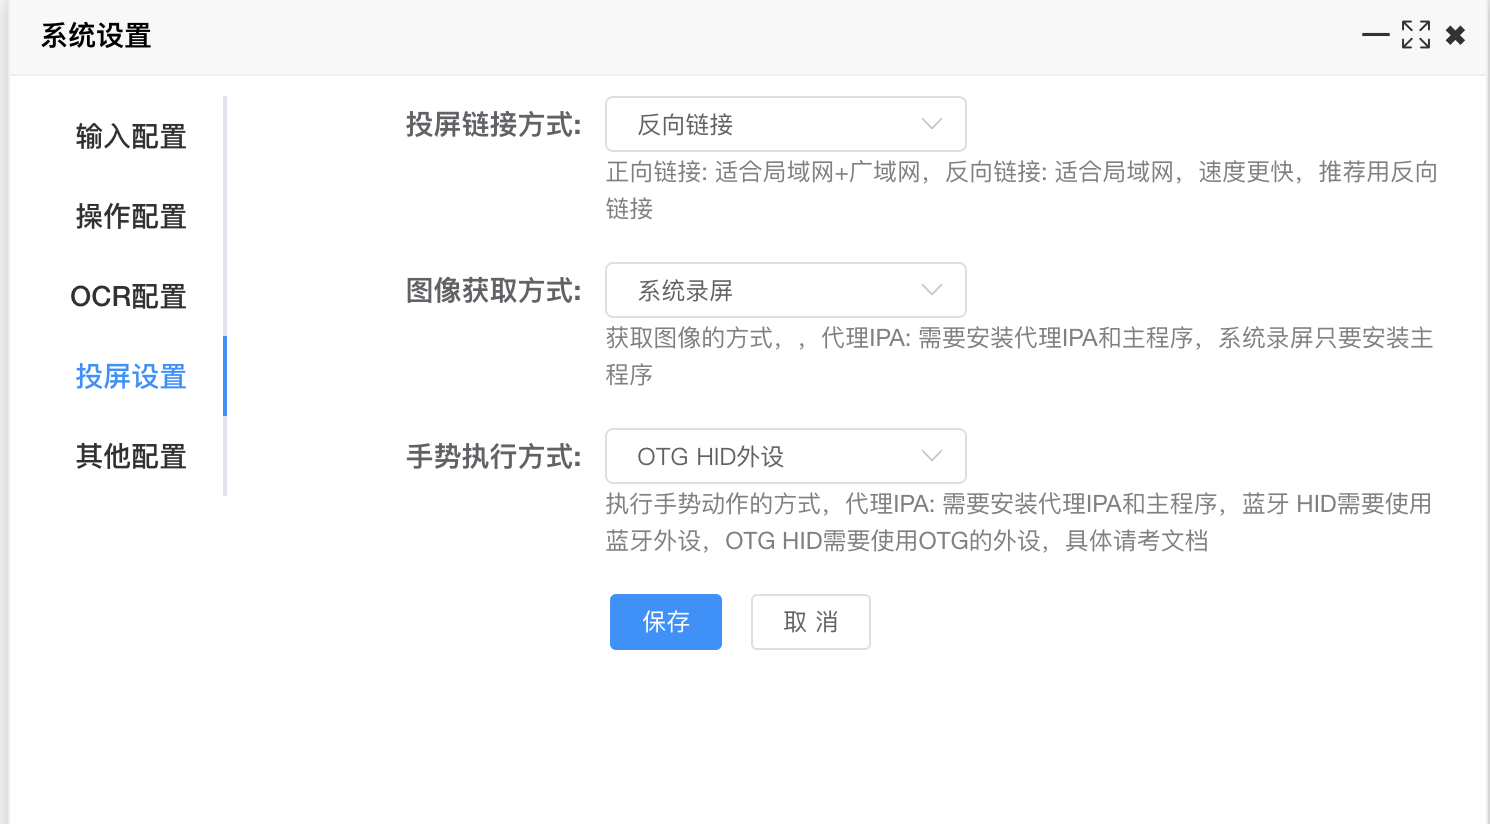
On the PC screen mirroring interface → System Settings, open Screen Mirroring Settings. Set connection mode to Reverse Connection, image capture to System Screen Recording, and gesture execution to OTG or Bluetooth as appropriate, then Save
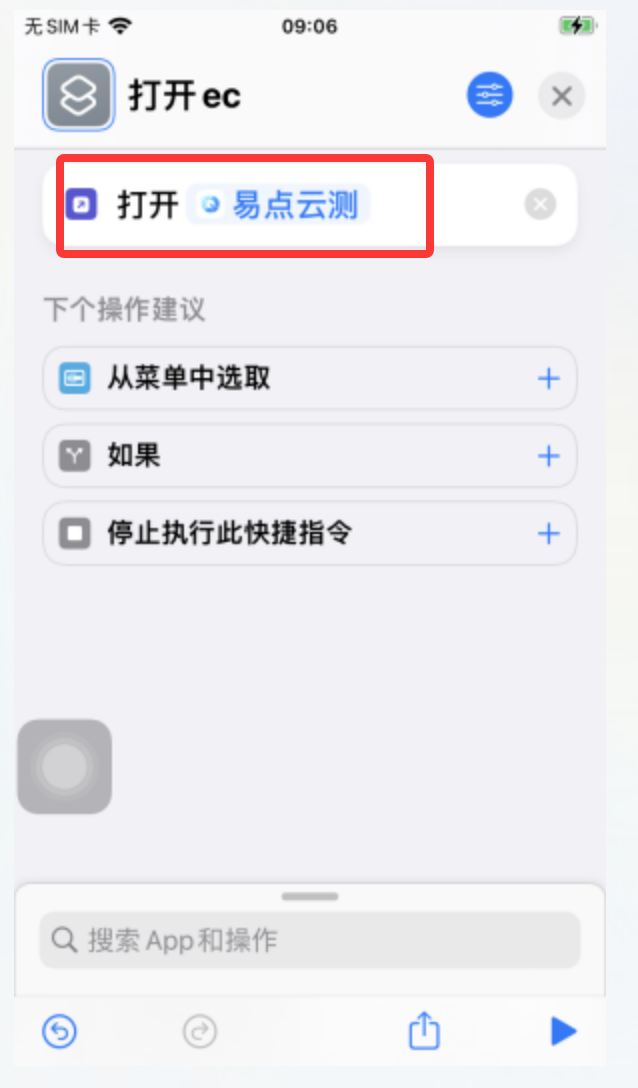
After setup, on the phone open Shortcuts, choose New, tap + in the top-right corner, search for Open App, select our main app, and tap the play triangle in the bottom-right to verify the main app opens
After Creating the Shortcut, Bind It
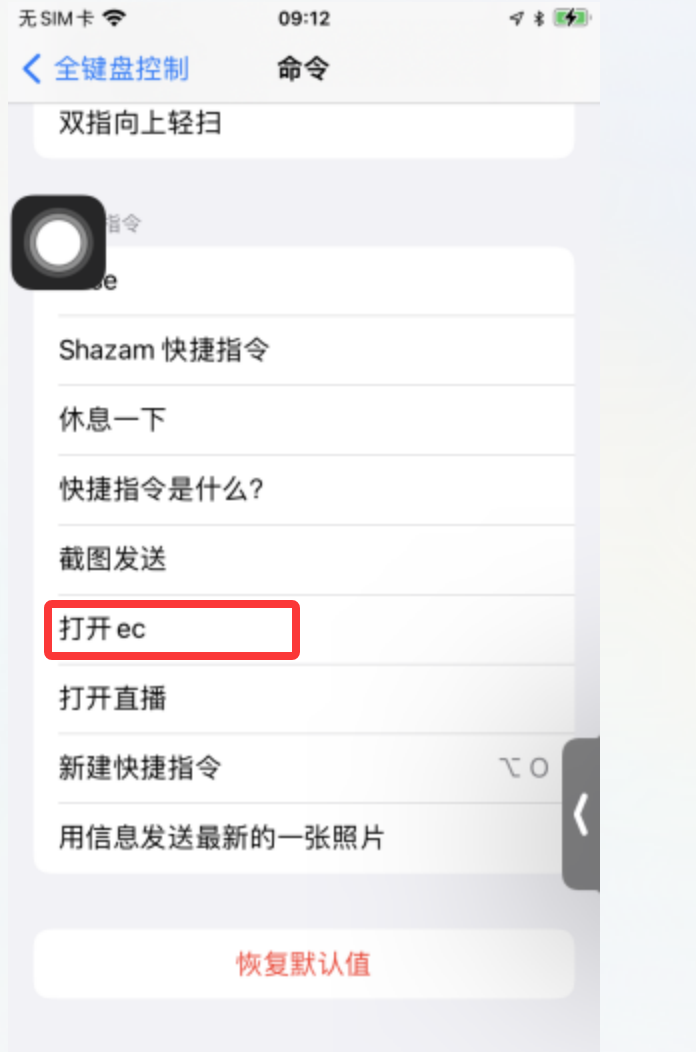
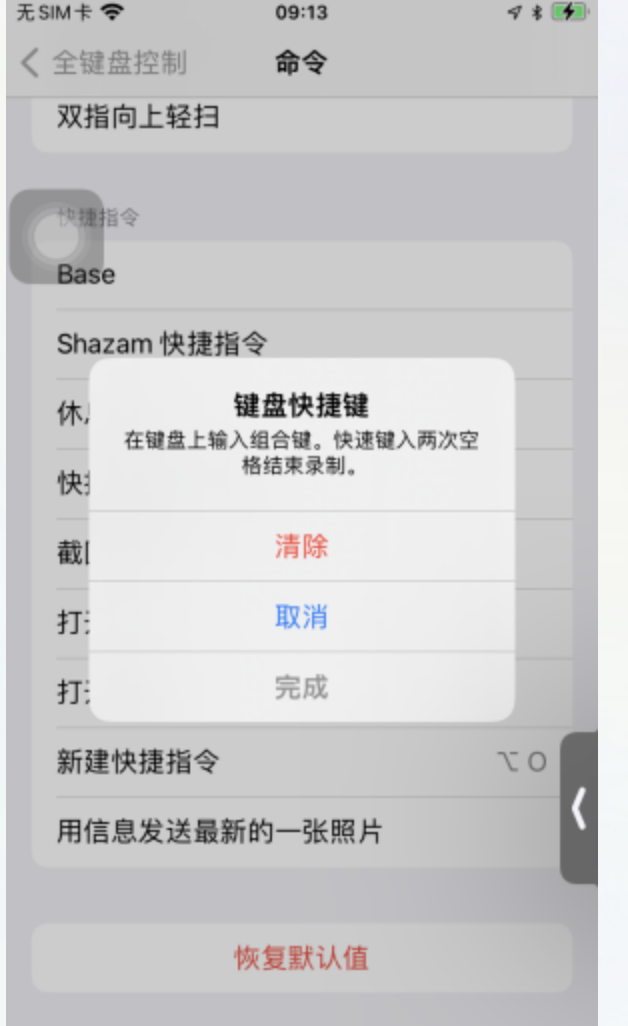
On the phone go to Settings → Accessibility → Keyboards → Full Keyboard Access → Commands, scroll to the bottom, find Shortcuts → Open EC (Open EC is your shortcut name), and tap it
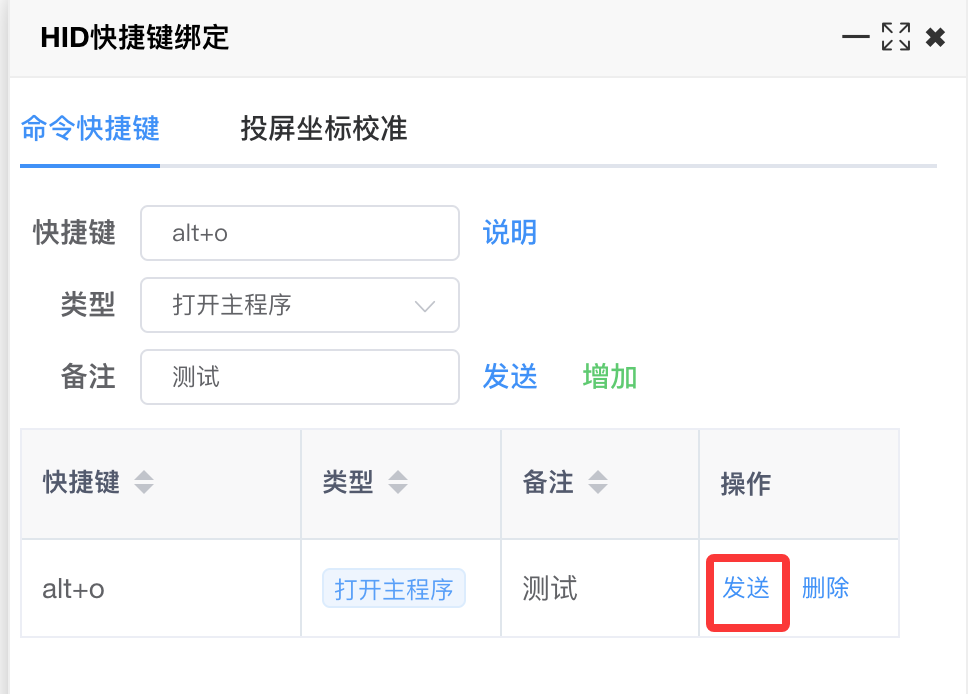
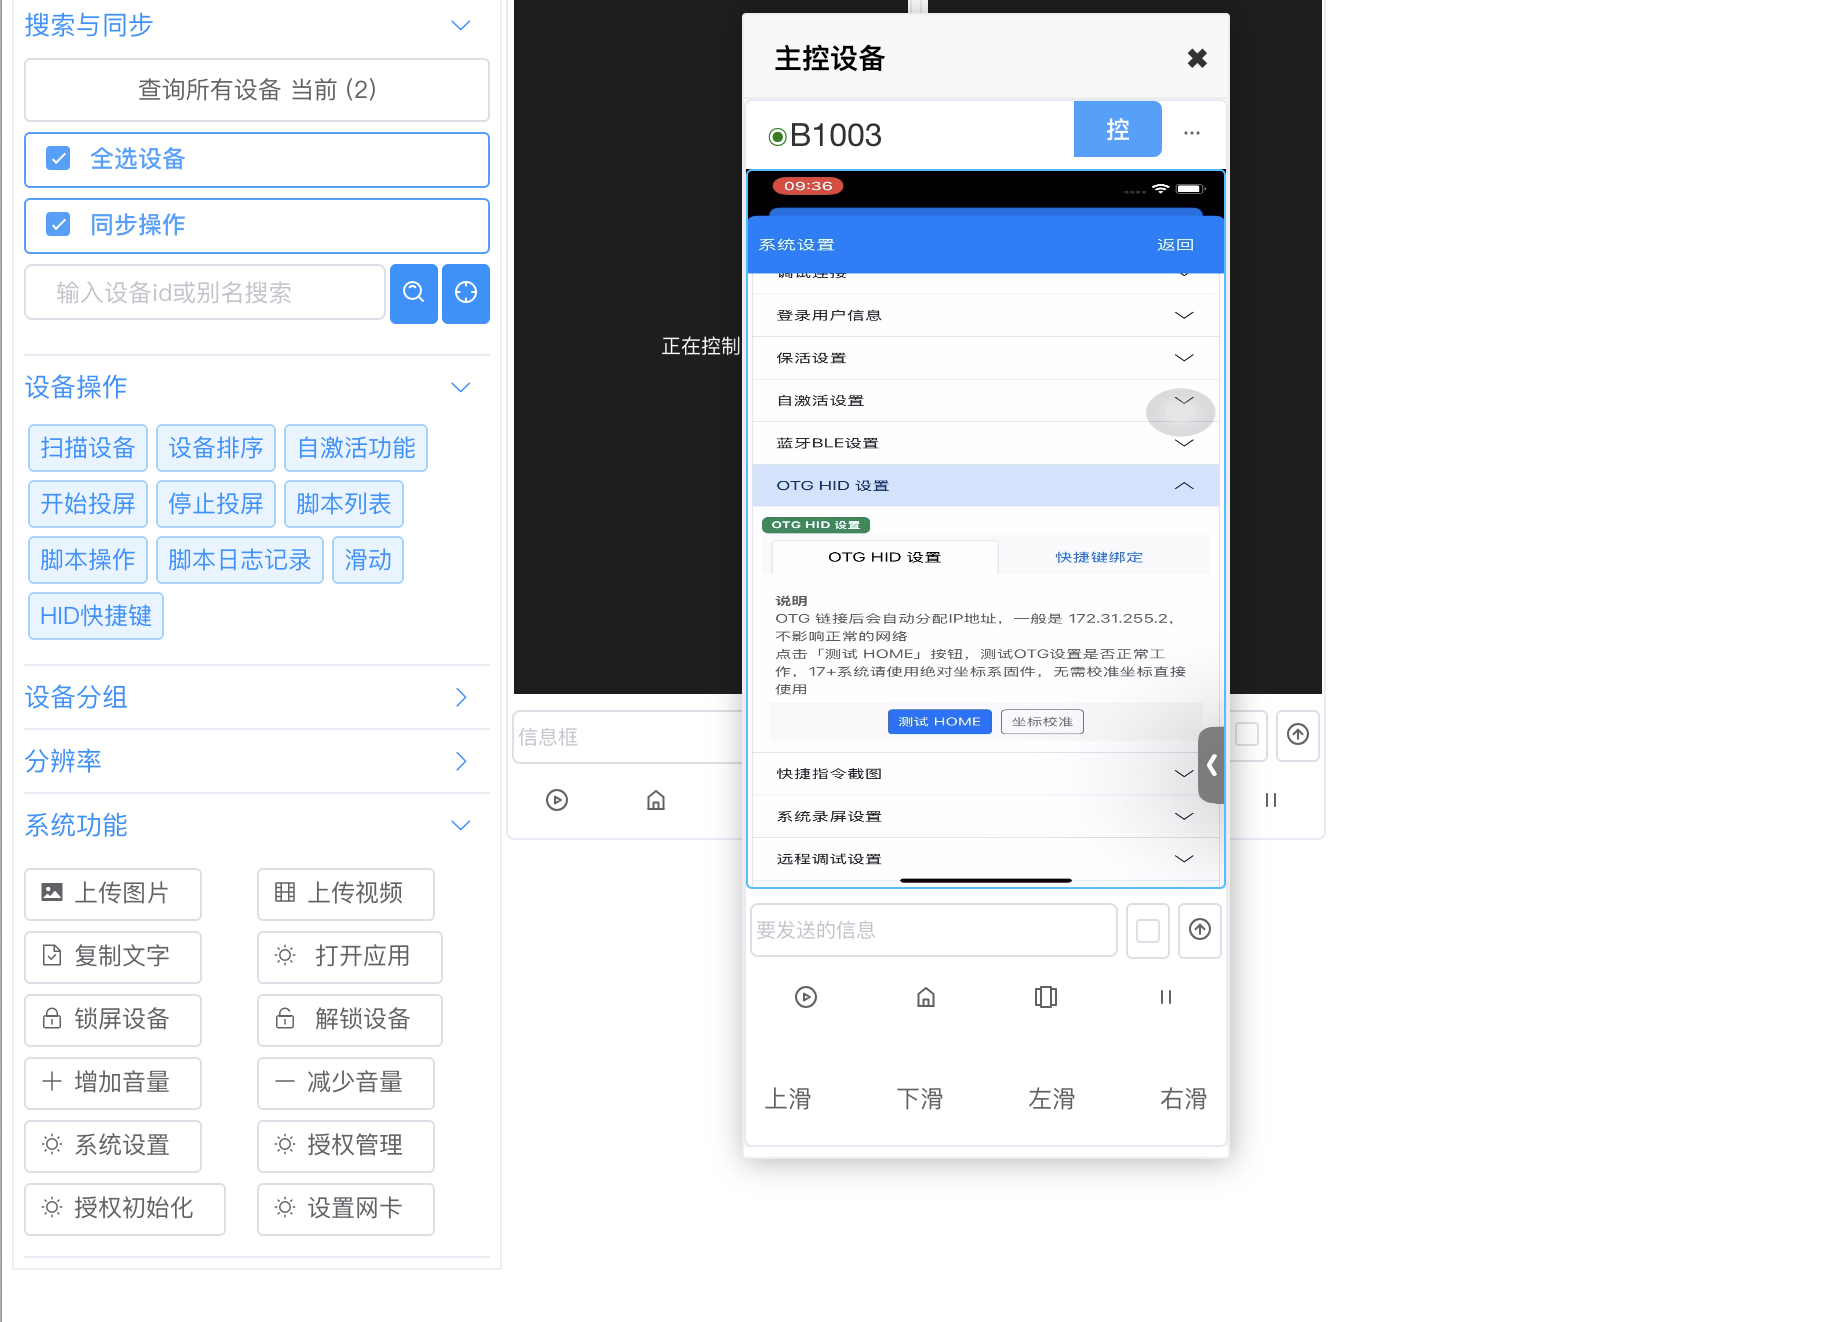
On the PC screen mirroring interface → HID Shortcut Button, enter alt+o (hold Alt+O on the keyboard) to register it — or use another shortcut
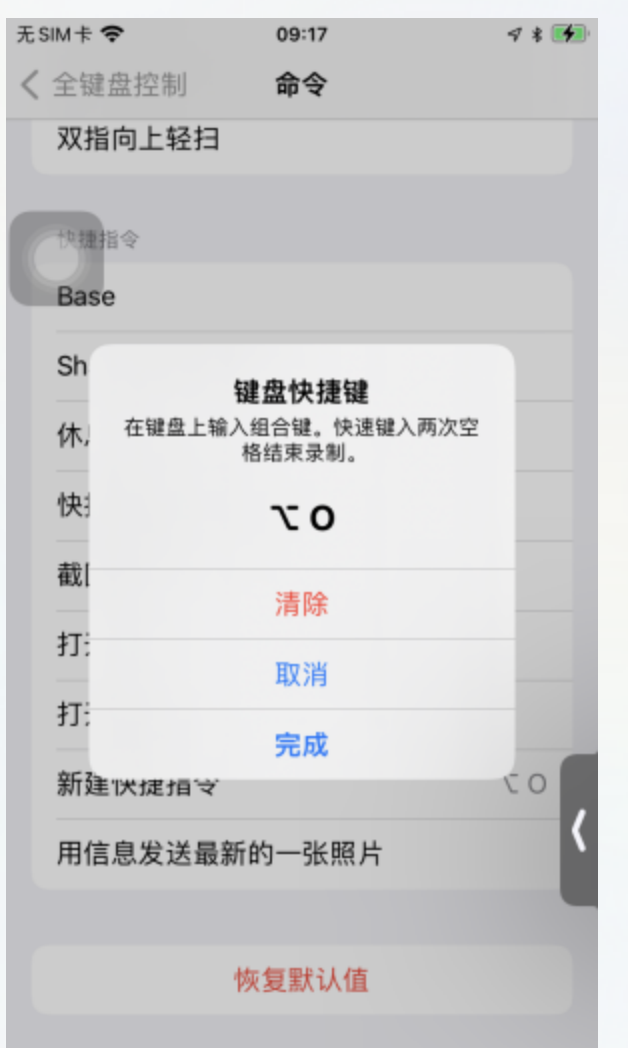
Choose type Open Main App, enter a note, tap Add, then Send. You should see the phone keyboard shortcut change; tap Done on the phone
Coordinate Calibration
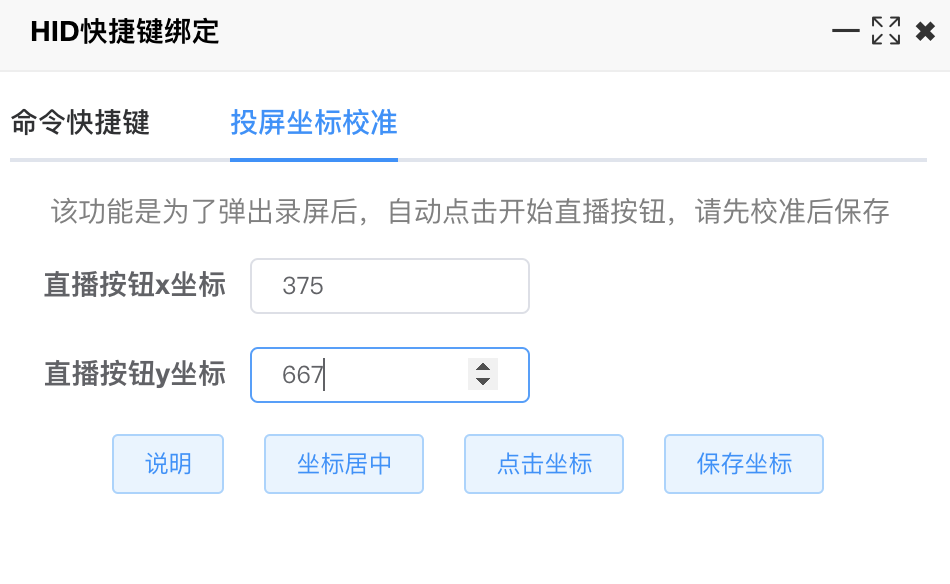
Coordinate calibration automates tapping the Start Broadcast button
On the PC screen mirroring interface → HID Shortcut Button, find Screen Mirroring Coordinate Calibration
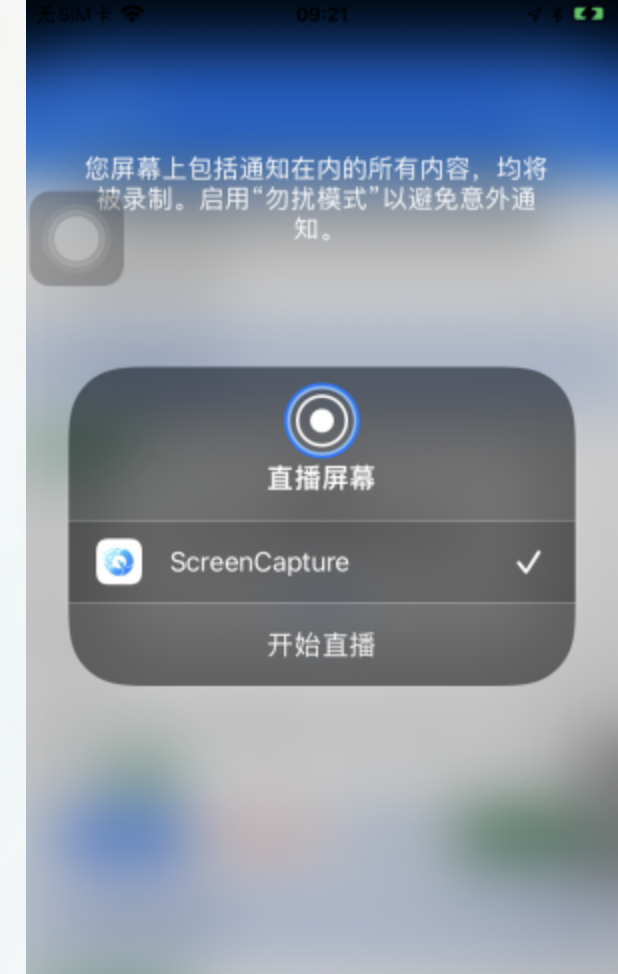
On the PC screen mirroring interface, tap Start Screen Mirroring to bring up the system screen recording dialog, or use App Settings → System Screen Recording Settings
First tap Center Coordinates to center on screen, then adjust x/y until the phone cursor moves onto the Start Broadcast button. Tap Tap Coordinates — if broadcasting starts on the phone, the coordinates are correct
Finally save coordinates: tap Save Coordinates and select target devices. Coordinates are reusable for the same model and OS version
Device Authorization and Screen Mirroring Authorization
Wireless screen mirroring requires authorization — contact official support or a reseller to purchase a license key
Device authorization is for running standalone scripts. If you only need screen mirroring, choose Standalone Screen Mirroring Authorization when authorizing
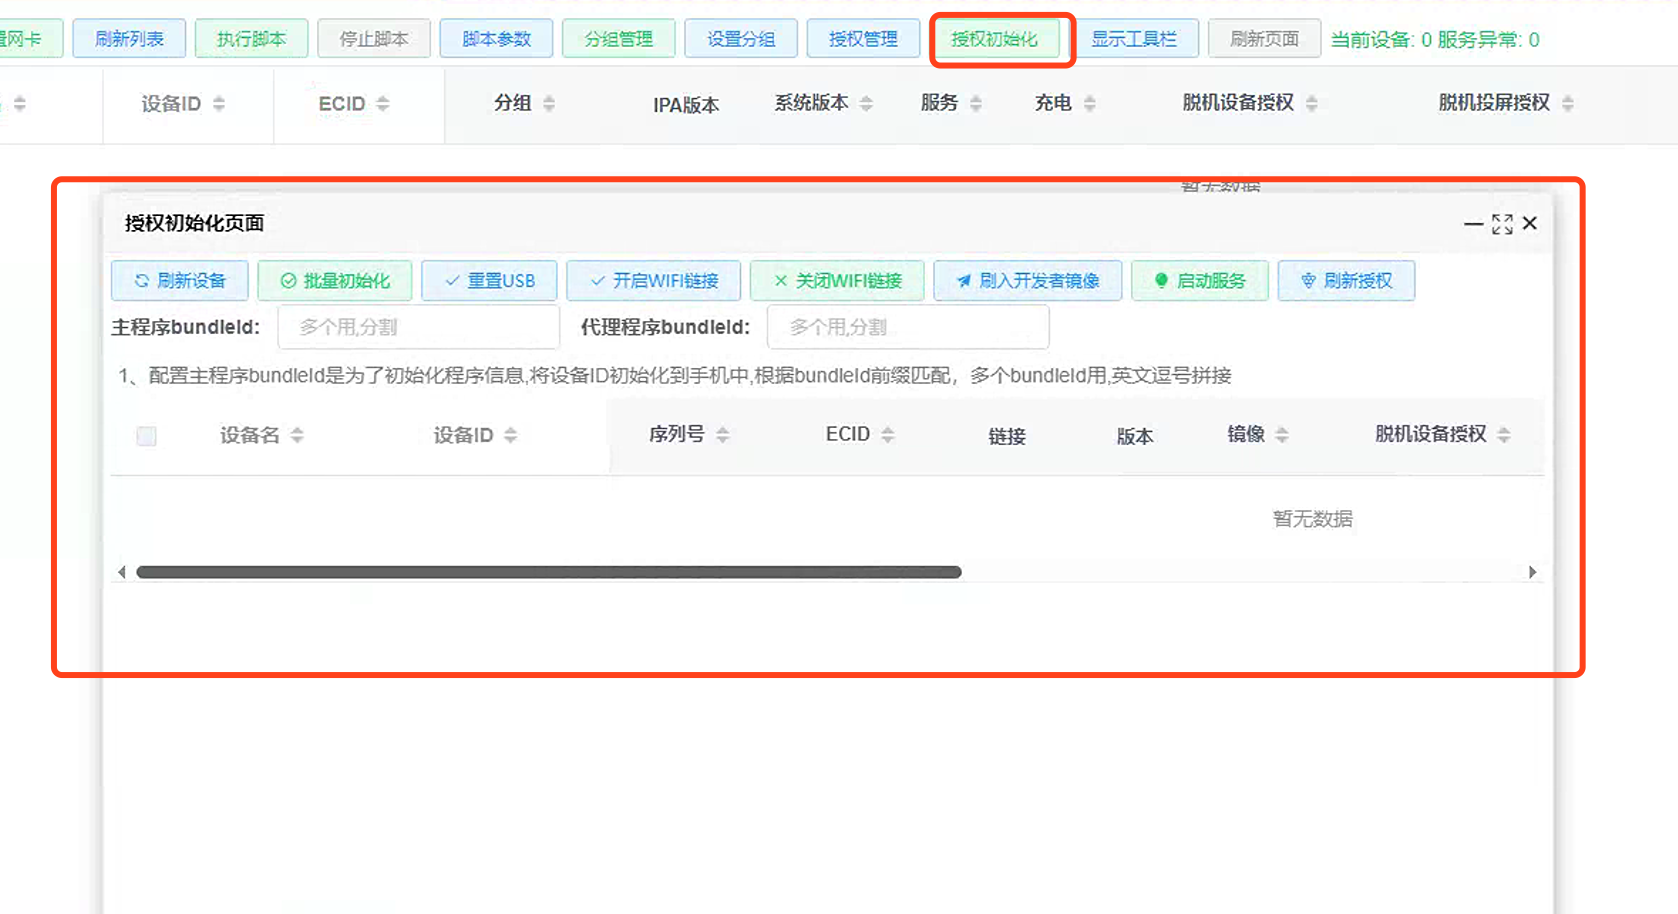
Connect USB to the PC, open the control center, and tap Authorization Initialize, or use Online Initialize
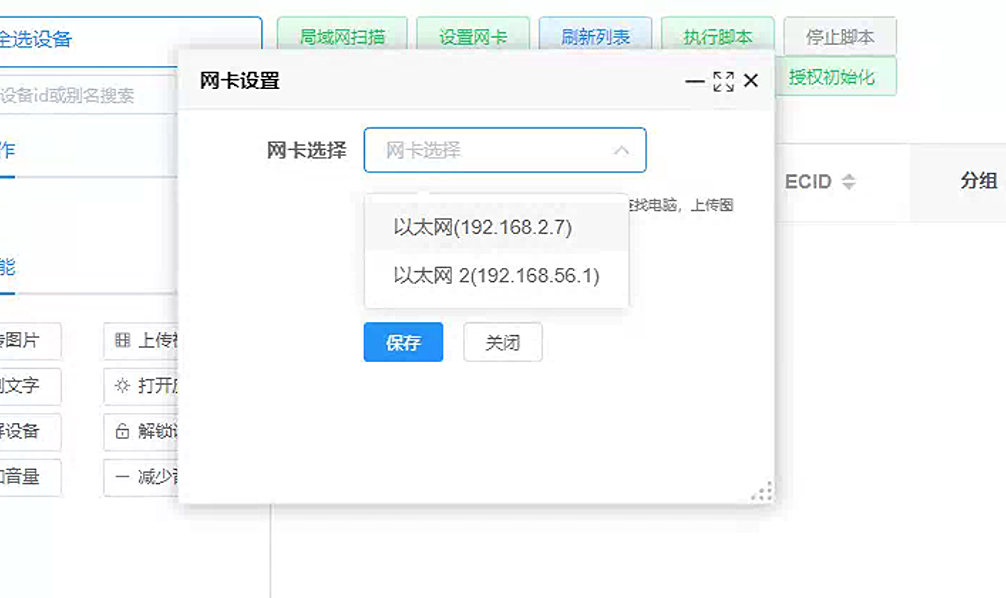
In the left toolbar of the screen mirroring interface, tap Configure Network Adapter and select a local IP to avoid multi-NIC scan issues
In the left toolbar, tap Start Scan. After scanning, the phone receives the command and connects to the screen mirroring program automatically
You can then start screen mirroring
Screen Mirroring Operations
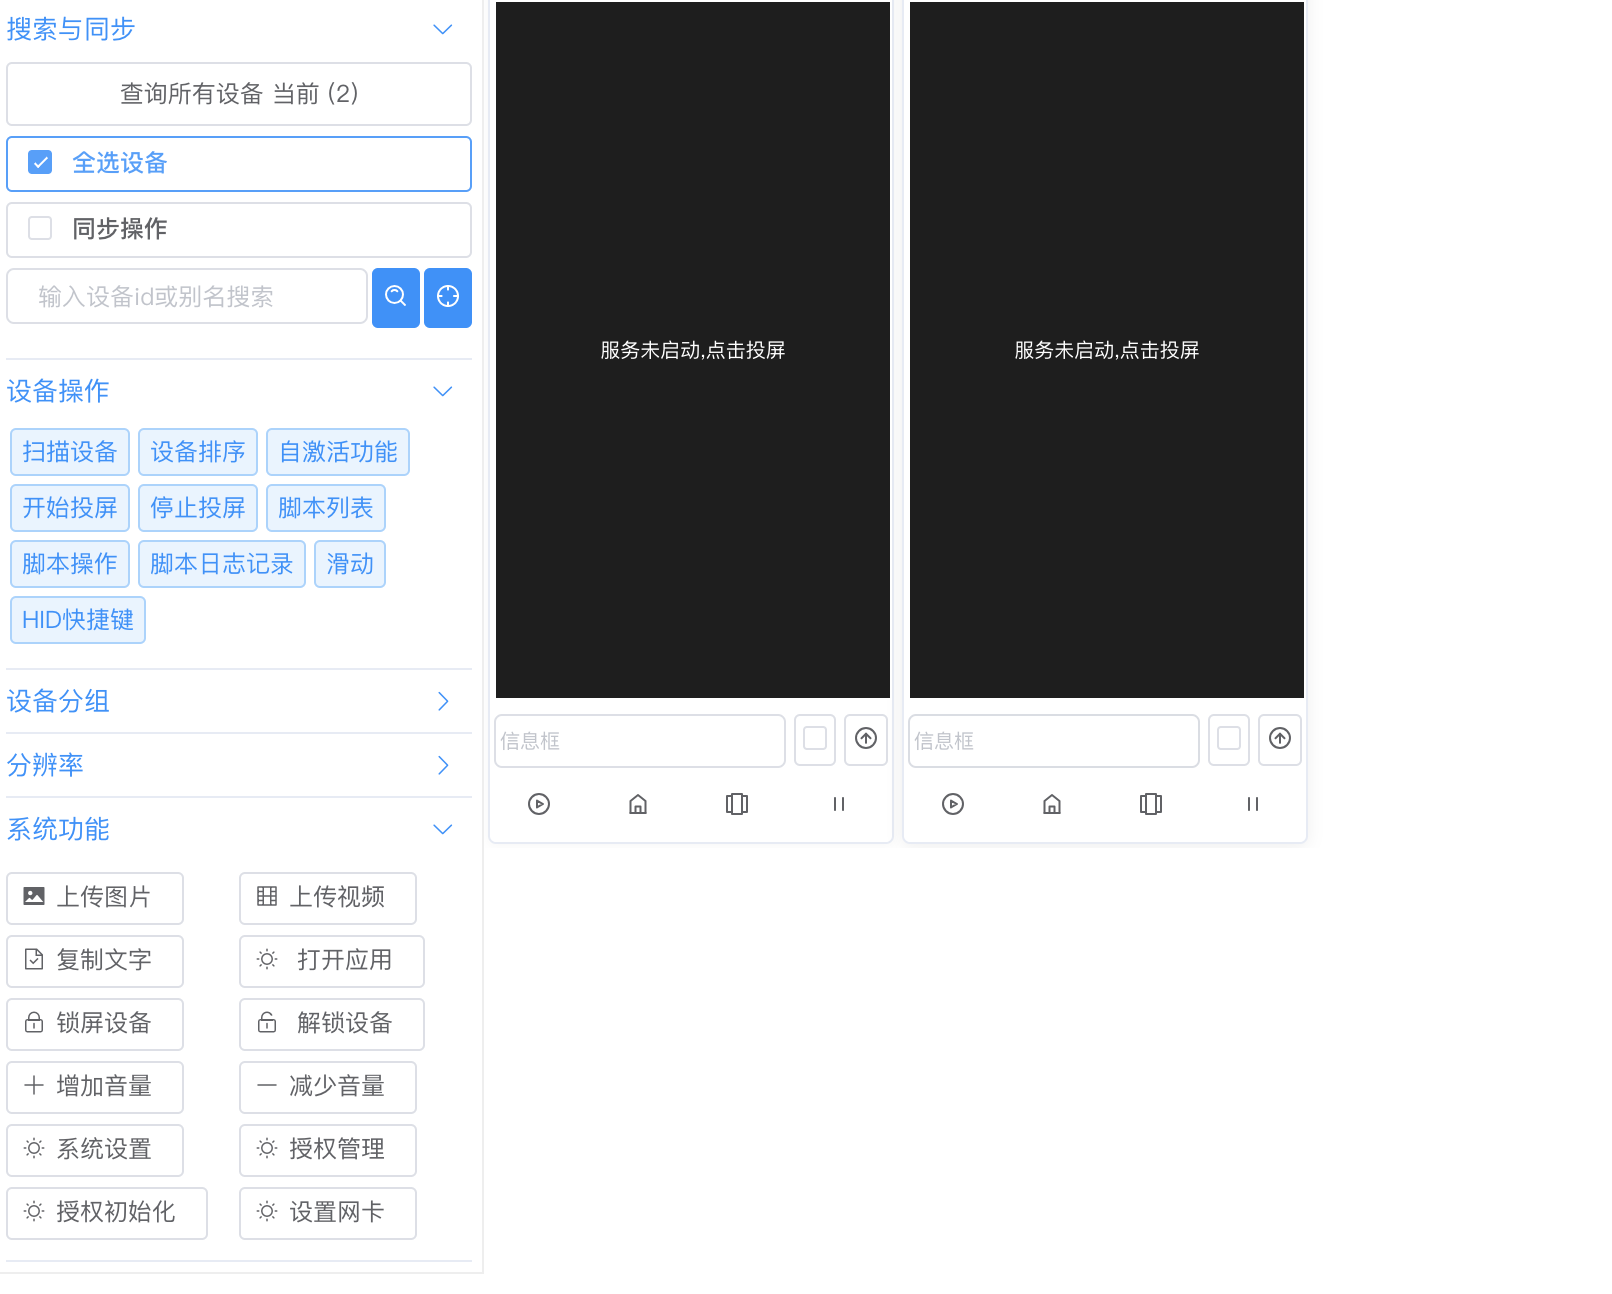
Open the screen mirroring program and tap the screen mirroring button — device authorization and automation service must be normal
Zoom in/out
Hold Ctrl and scroll the mouse wheel
Set master control
Right-click a small screen to set it as master
Synchronized control
On the main screen, select the Control button for synchronized operations
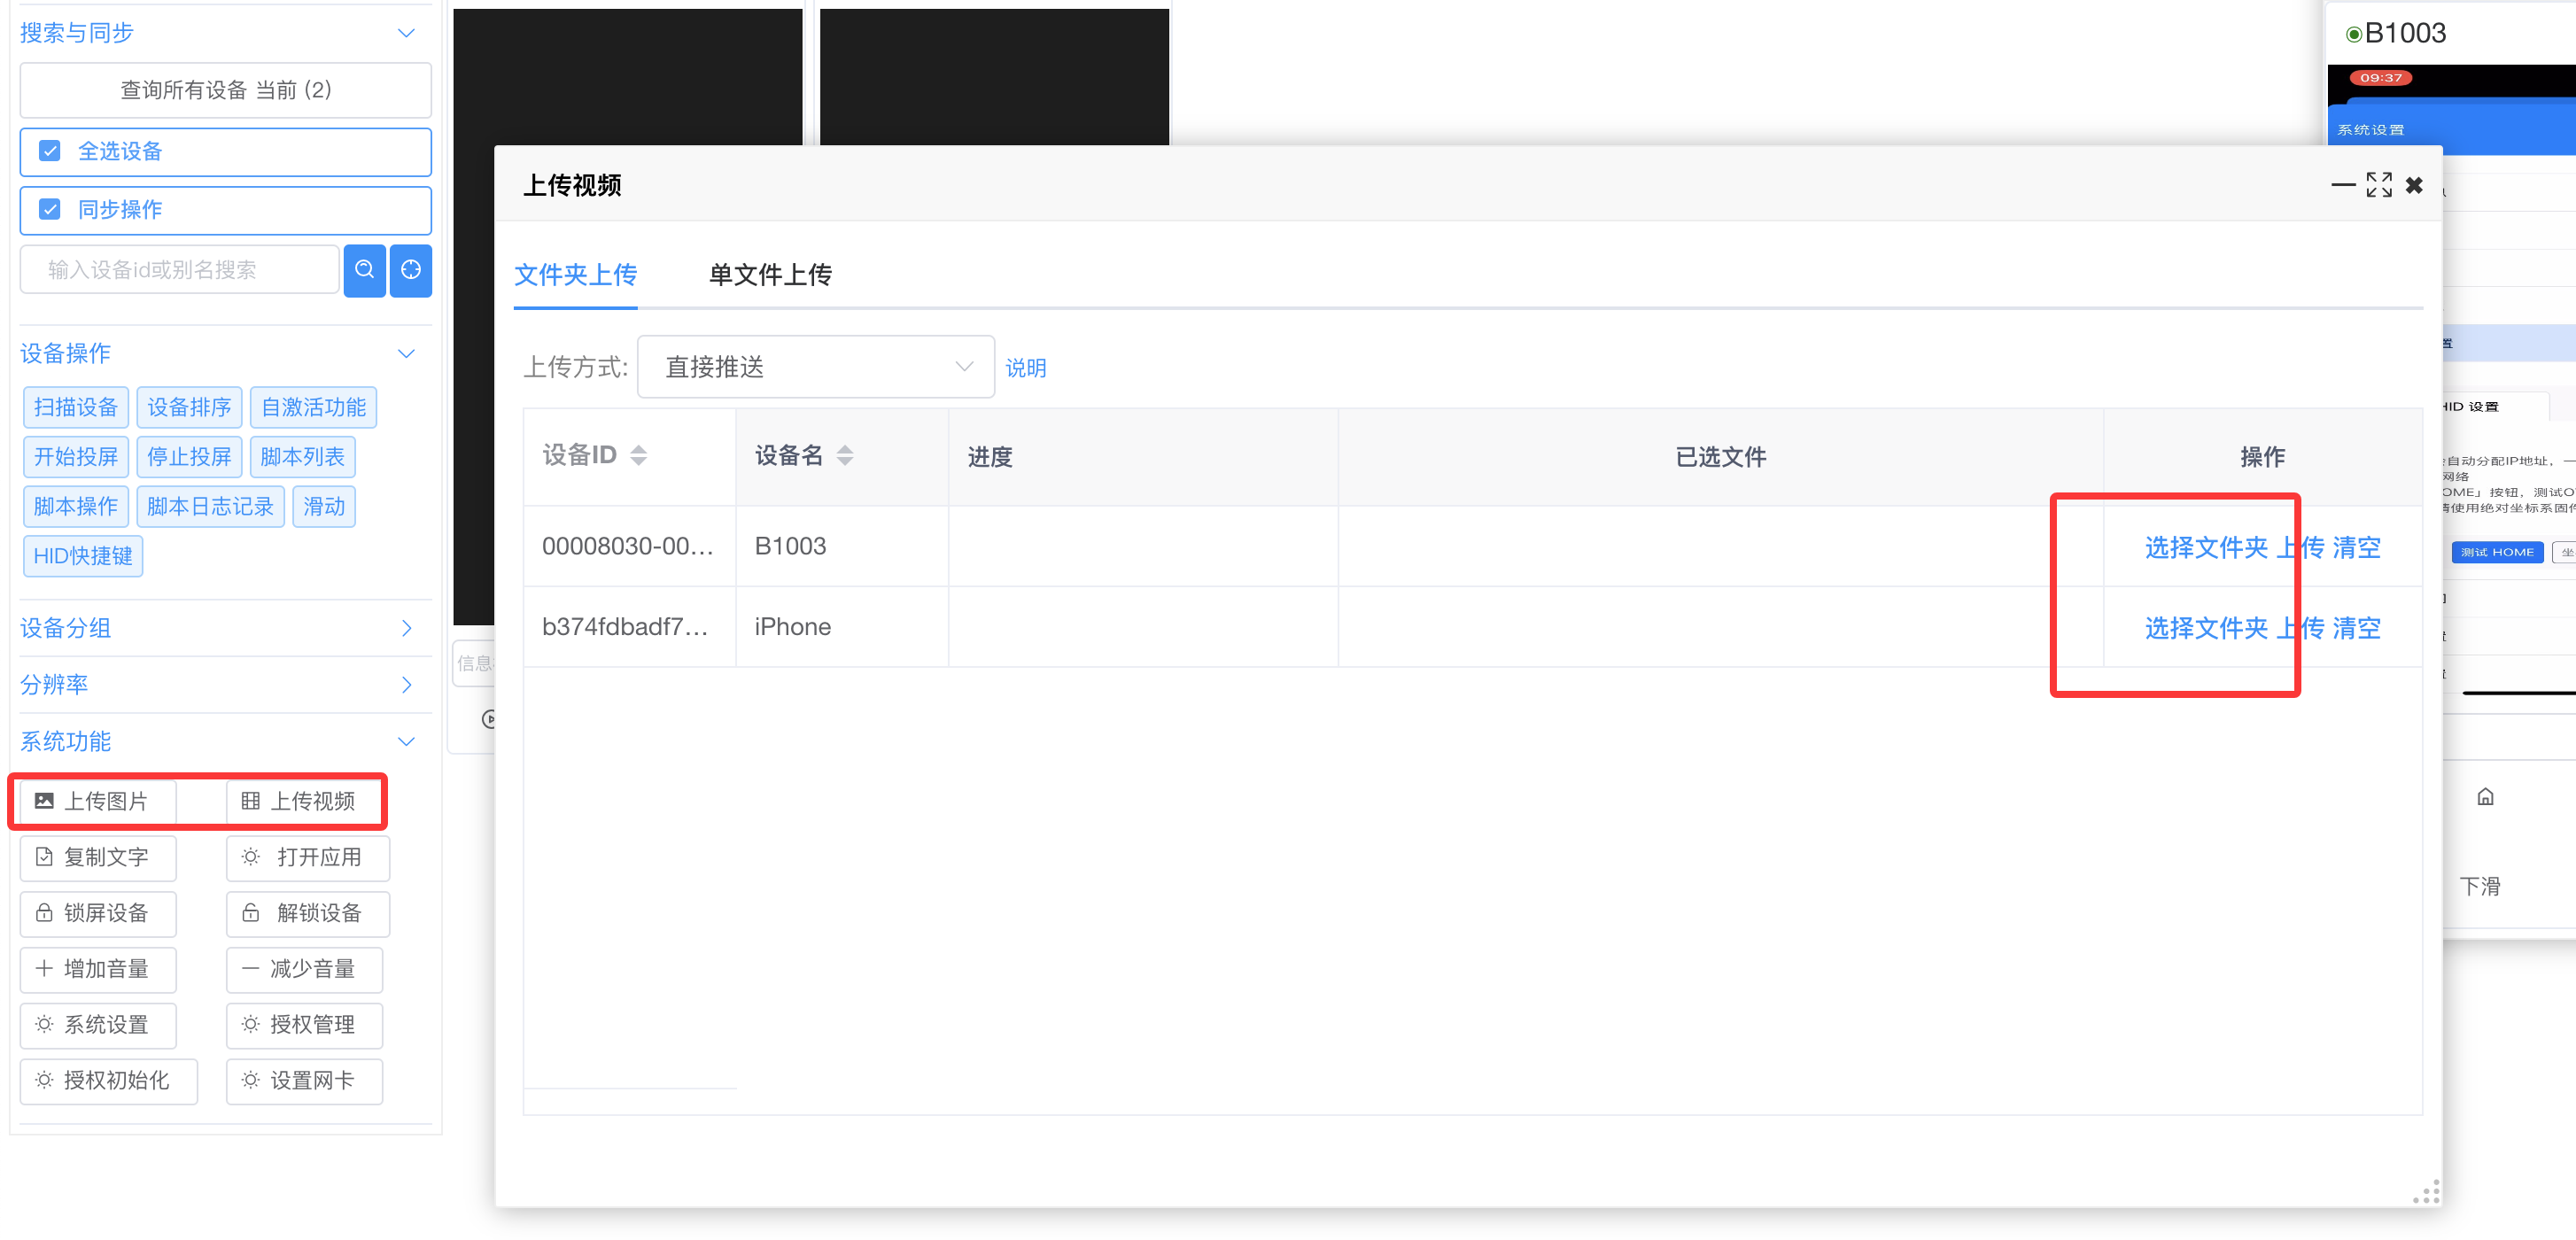
Upload images/videos
Choose Upload Image or Upload Video
Select a file and send, or upload an entire folder
Other operations
Open app
Send text to phone clipboard
Read text to PC
These are available via right-click on a small screen or from the toolbar
Text Input
Go to PC Screen Mirroring Interface → System Settings → Input Settings and choose input method or Follow HID mode
Default is proxy IPA input (proxy screen mirroring only)
Use the main app as the input method
On the phone: Settings → General → Keyboard → Keyboards → Add New Keyboard, enable the main app name keyboard. Restart the device if the name does not appear
After setup, on the keyboard page tap the keyboard name and choose Allow Full Access
Custom input method avoids freezes when the input field loses focus
In OTG/BLE mode you can also choose Follow HID
Follow HID uses external HID for input, following the gesture execution mode option
HID acts as a keyboard — switch the PC to English input and type to see characters on the phone
Control Center Operations
Connect to Control Center
Launch the control center or screen mirroring app and register and log in (top-right corner)
If multiple network adapters exist, select the one on the same LAN as your phone, or connection may fail
Tap LAN Scan and wait for devices to connect. If none appear, tap Refresh List
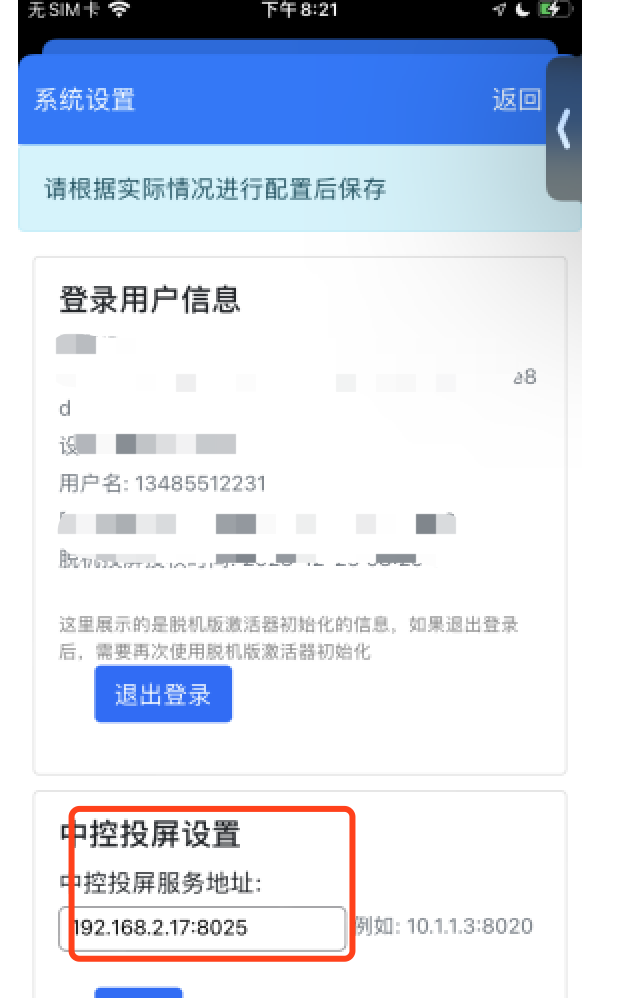
If devices still are not detected, open the main app on the phone, go to Settings, and find control center screen mirroring settings
Enter your control center PC IP + port 8025, save, kill the main app process, then reopen it, for example:
Run Scripts
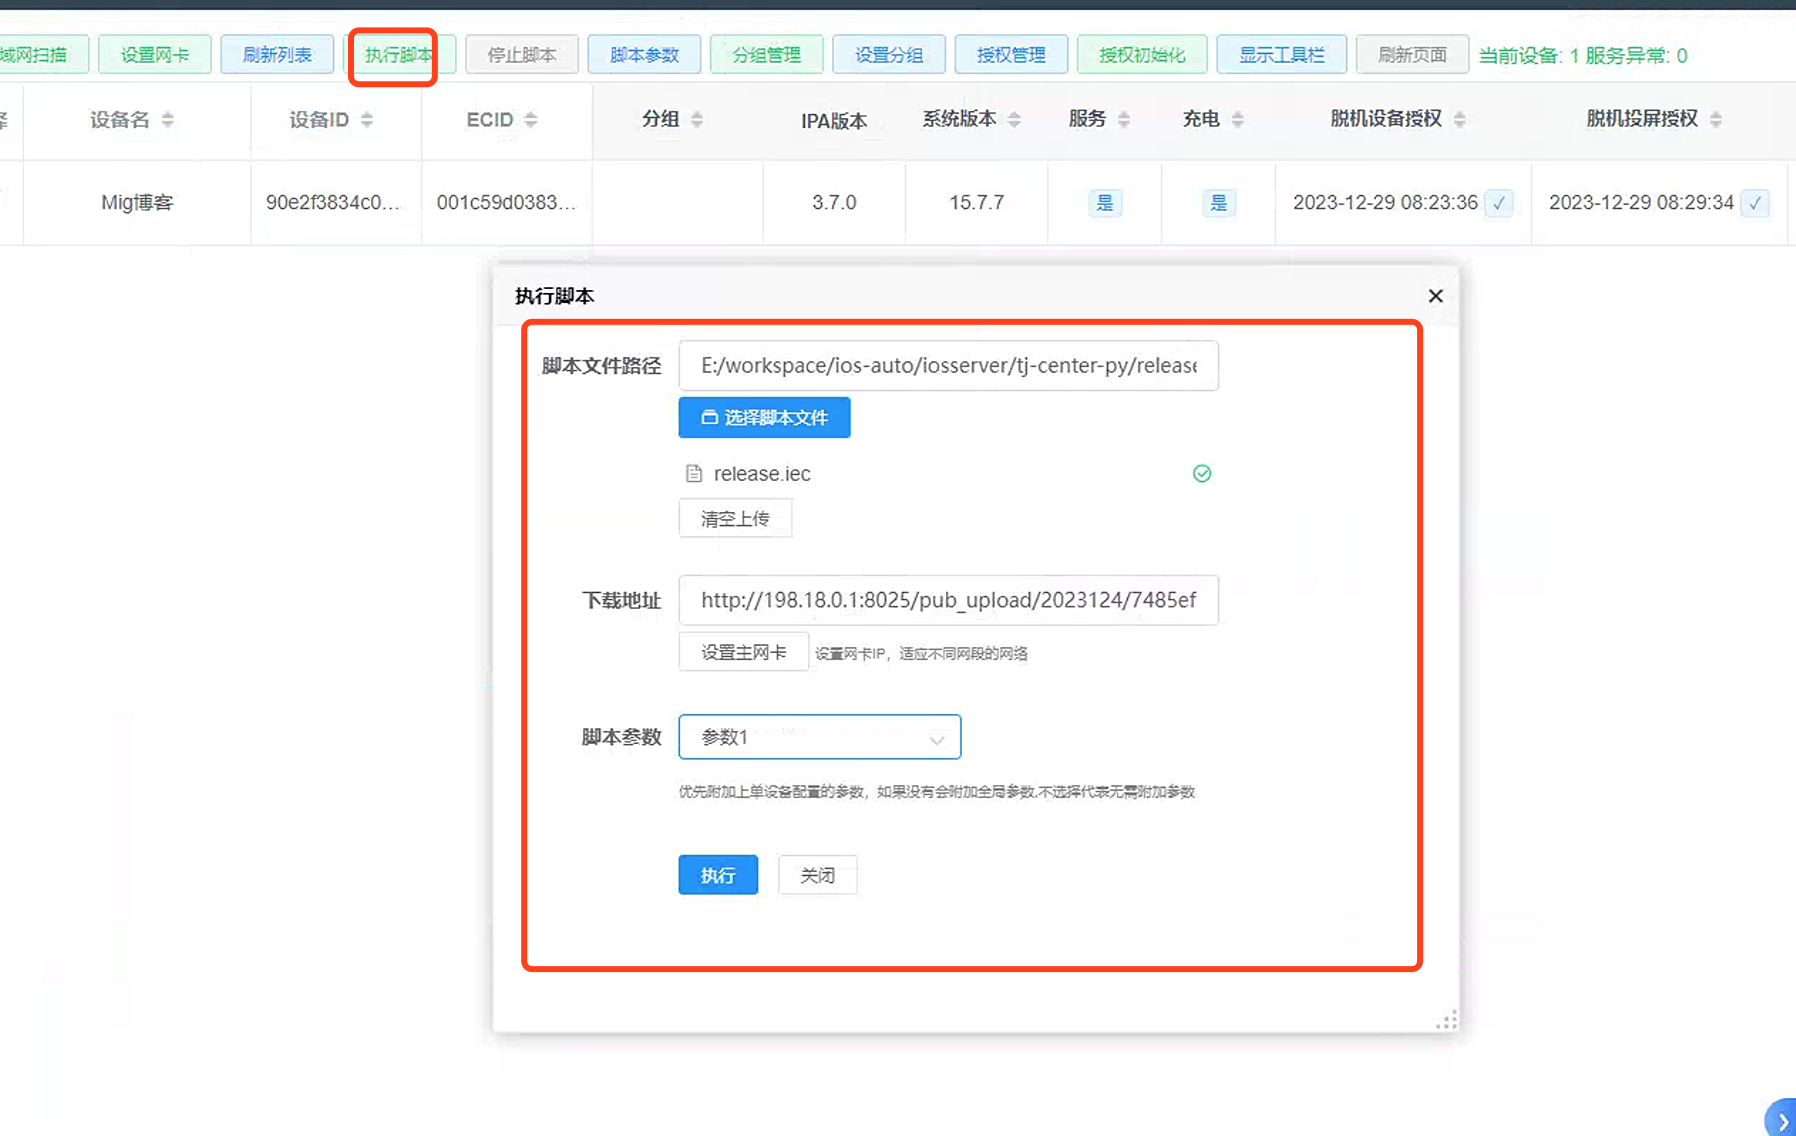
In the control center or screen mirroring app, tap Run Script, select an .iec script file, optionally set script parameters to read values without building a UI, then tap Run
- View logs in real time while the script runs
Self-Activation Module
The self-activation module can start/stop automation without manually tapping icons or rebooting the phone, but self-activation environment setup is required
These features cannot be used directly — configure corresponding commands in Full Keyboard Access via HID Shortcuts
Copy and Paste
Copy, paste, open app, and open URL require the main app in the foreground
Each such feature includes an Open Main App button. No extra setup in proxy mode; in OTG/BLE mode, configure the open-main-app shortcut first
OTG/BLE Coordinate Issues
Only absolute-coordinate firmware for iOS 17+ is supported
Freshly flashed firmware or first connection may report wrong coordinates — try rebooting
Or see Bluetooth and OTG docs to adjust coordinate sensitivity
Cannot Mirror Screen
Automation not started — on the phone tap the agent app to start automation
Authorization issue — tap Authorization Management, authorize the device, tap Update Authorization, and verify the authorization expiry
Main app App Settings → User Info must include screen mirroring permission
Device Cannot Connect
Phone not authorized — with standalone script authorization or standalone screen mirroring authorization, initialize with the activator or standalone control center
Main app App Settings → User Info must show user and authorization info
Phone and control center must be on the same LAN; multiple subnets require routing between them
 - View logs in real time while the script runs
