Install the control center
What the control center does
- Core host for running HarmonyOS Next USB scripts and screen control
Download
- Open the Downloads page or Tutorials & resources and enter the cloud drive
- Under
HarmonyOS Next resources→USB edition, download the latest package (control center + screen control) - Extract to a path with English folder names — Chinese paths can cause unexpected issues
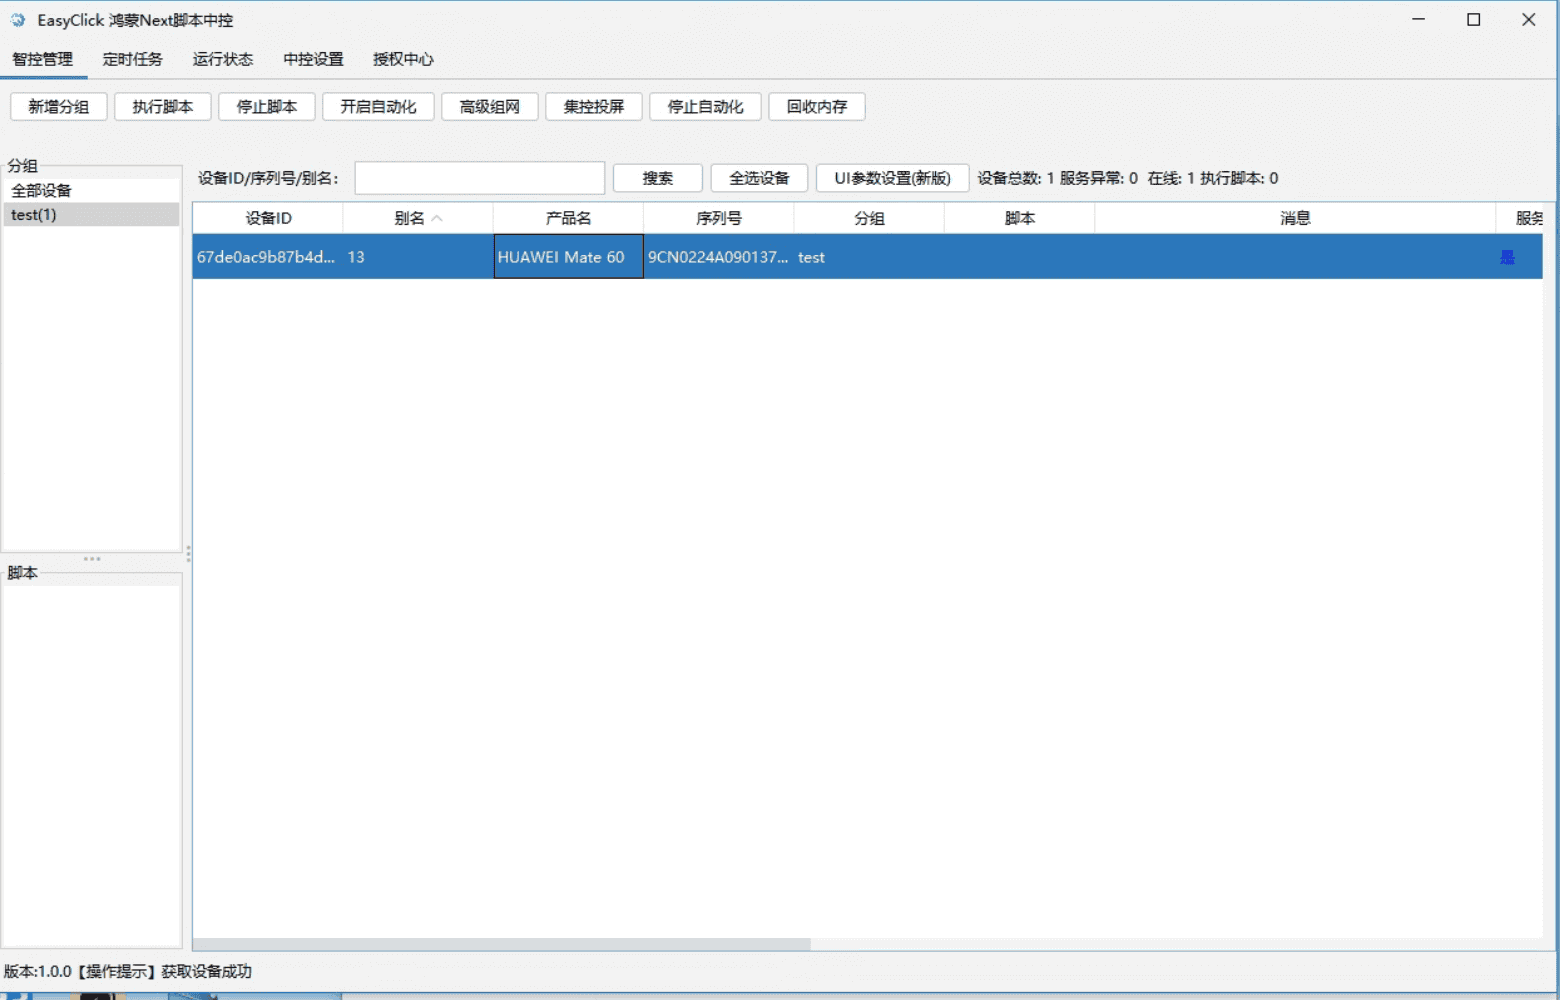
Start the control center
- Example on Windows
- In the extract folder, double-click
新中控.exe(New Control Center; do not launch the screen-control app directly) - For the new screen UI: after the center starts and you sign in, use the toolbar 集控投屏 → 全新界面 (Group mirroring → New UI)
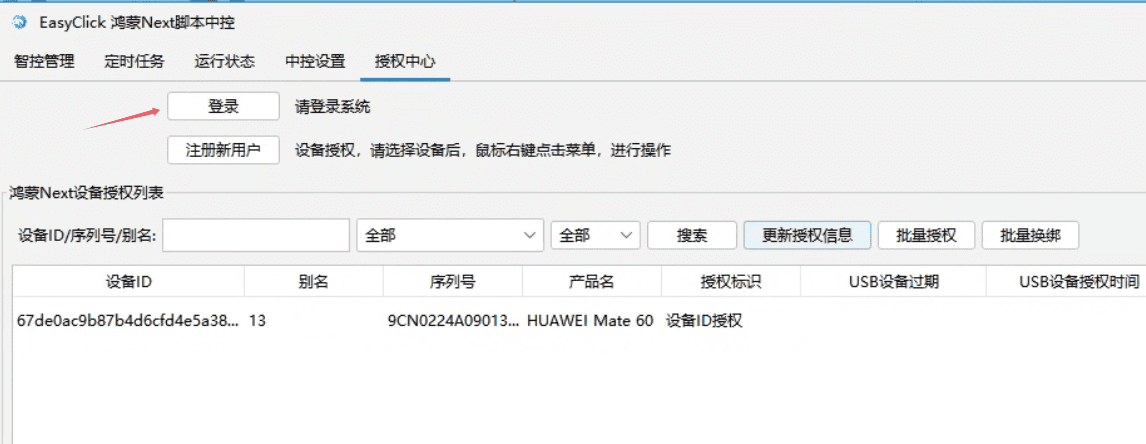
Sign in
- Main UI → Personal center
- Sign-in is required by default; register an account if you do not have one
Connect a phone
USB
- Enable Developer mode: Settings → About phone, tap Software version seven times
- Settings → System → Developer options, enable USB debugging, then connect with a USB cable
- If prompted for USB debugging, choose always allow for this computer
-
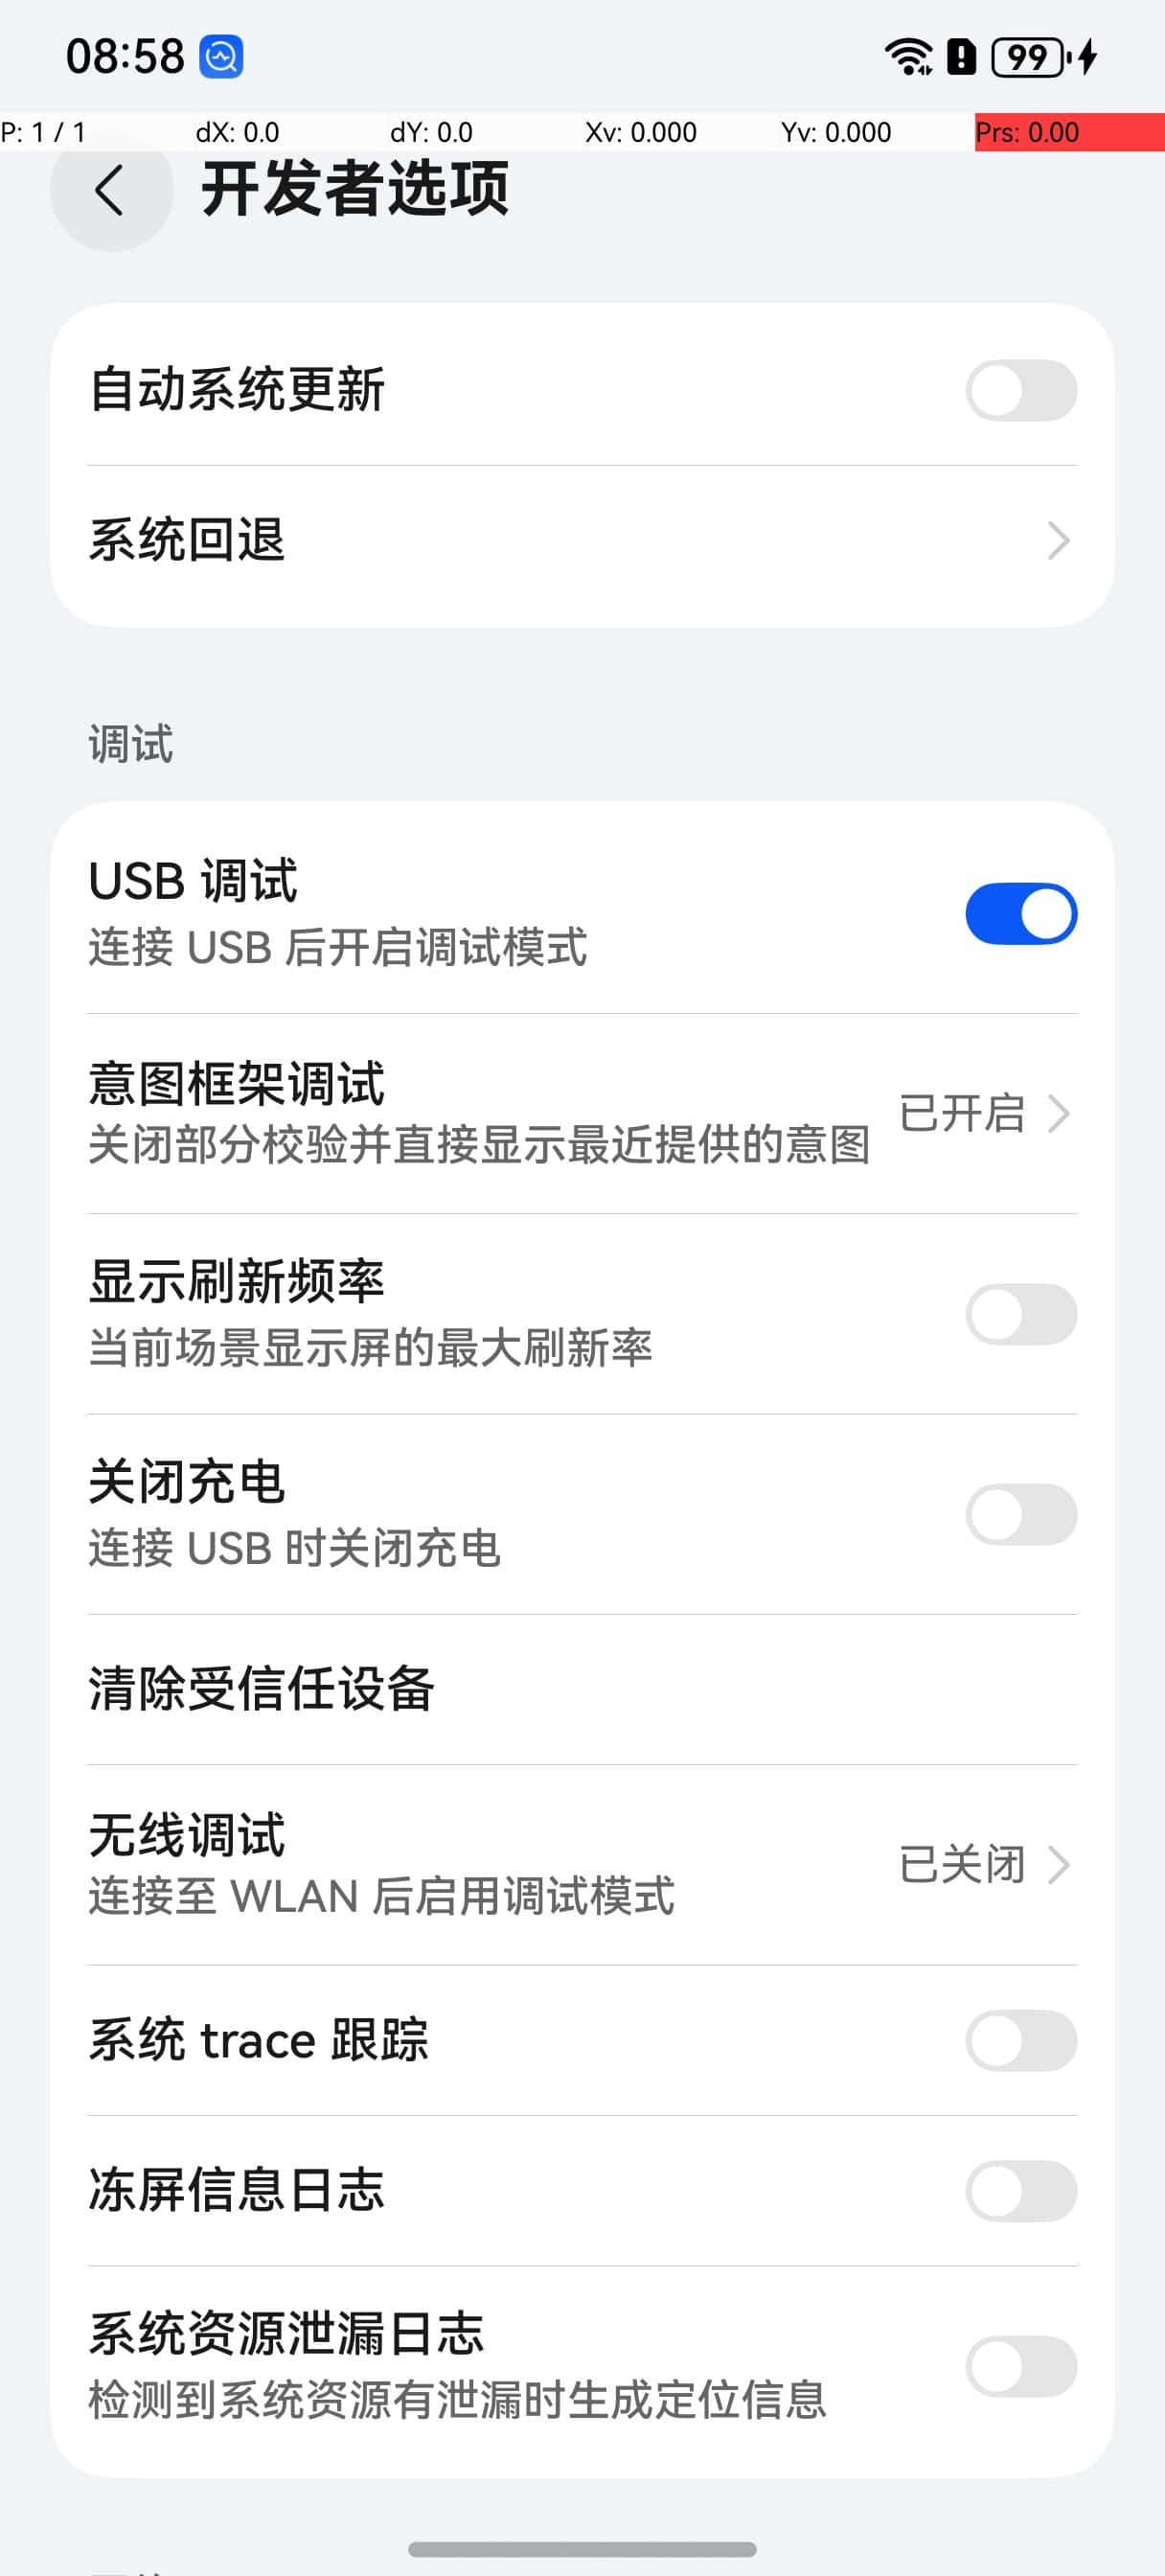
- When connected, the device appears in the control center
Wireless debugging
- In Developer options, enable USB debugging, then open Wireless debugging to get IP:port
- In the control center, click Scan wireless devices, enter IP and port, then scan
Enable wireless debugging from the center
- Phone wireless ports are often random. Prefer USB first, then click Enable wireless debugging in the center
- Unplug the cable, click Scan wireless devices, enter IP:port, and scan
Start automation
- Connected devices show up in device monitoring
- Select a device, click Start automation, wait until service status is Yes, then start coding
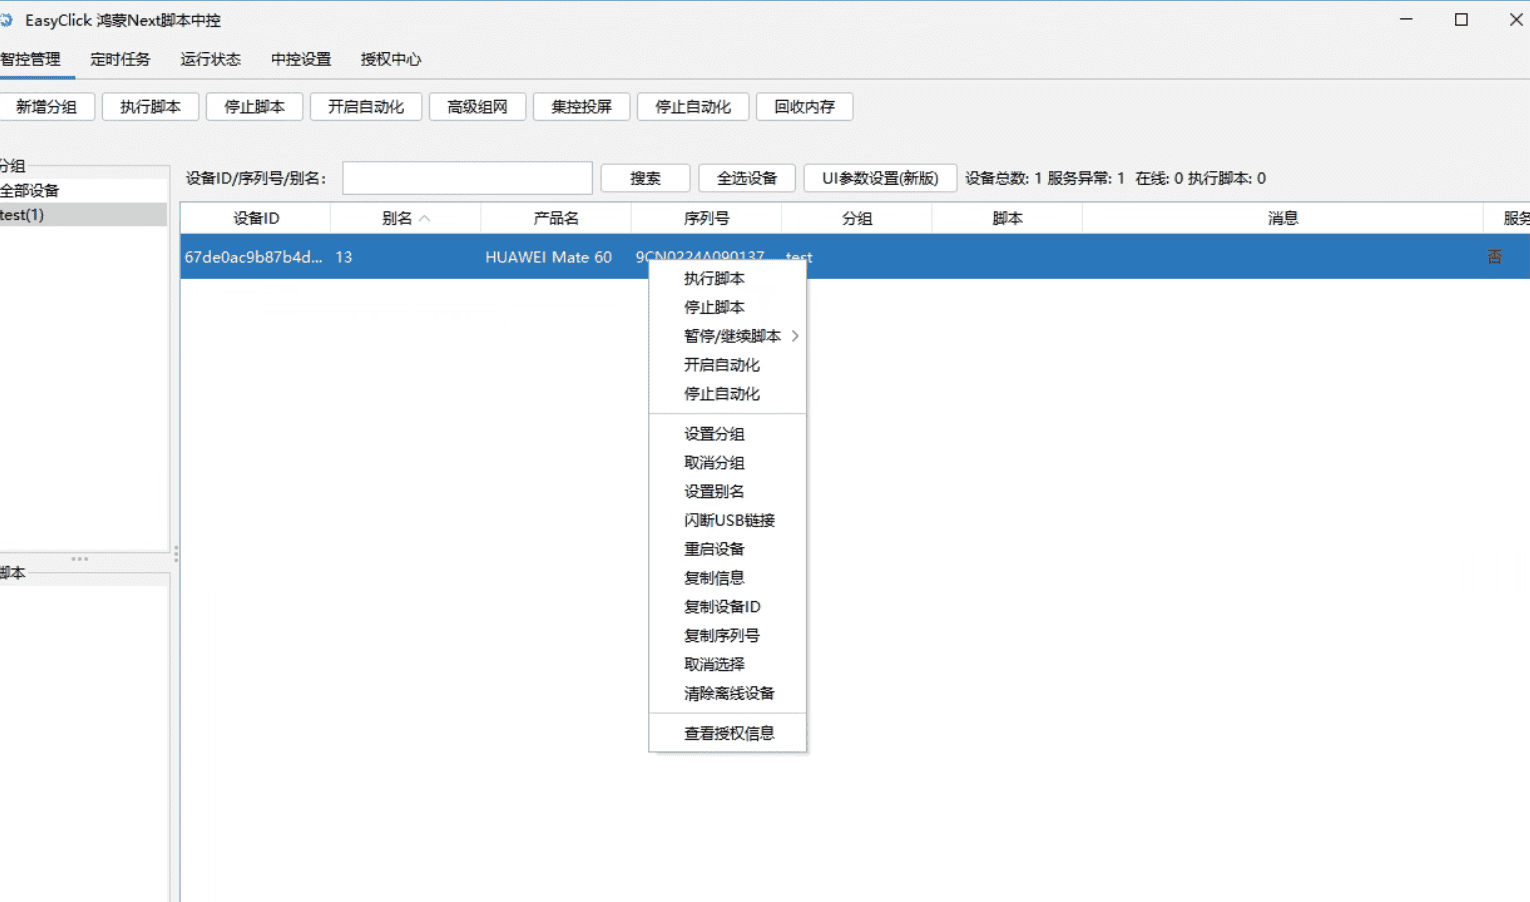
Run a script
- Right-click in the control center → Run script → pick an
.iecfile
Next steps
- Downloads · Tutorials & resources
- New control center guide (UI, groups, licensing, schedules, context menu)
- New screen guide (new mirror UI, sync, presets, BLE)
- Bluetooth BLE guide (3.2.0+)