HarmonyOS Cluster USB Edition — Beginner Install Guide
This guide walks you through installing EasyClick HarmonyOS Cluster USB Edition control center and mirroring with screenshots: product downloader → control center → connect device → start automation → licenses → group mirroring. Built for first-time HarmonyOS Cluster USB Edition users.
Before you start
- A Windows PC (install via the product downloader)
- A HarmonyOS Next phone with a USB cable
- Developer Mode and USB debugging enabled on the phone
- Access to the official site to download the product downloader
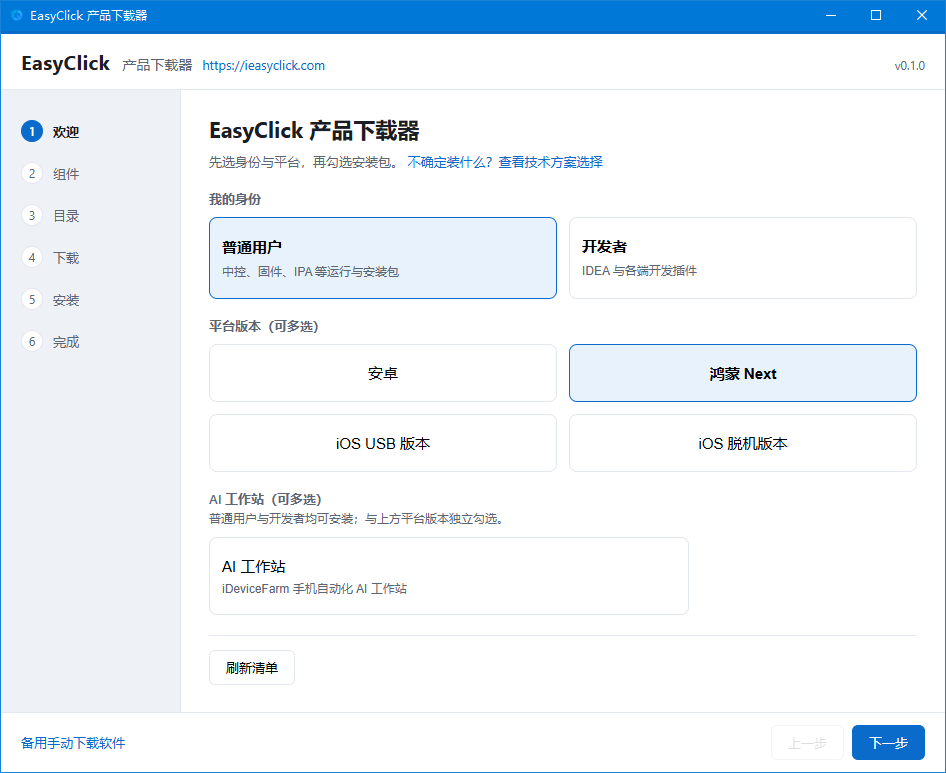
1. Open the product downloader and pick identity / platform
Download and open the EasyClick product downloader:
- On this site: Download the product downloader
- Software downloads: Download area
After it opens:
- Set My identity to Regular user
- Under Platform version, check HarmonyOS Next
- Click Next
2. Select required components
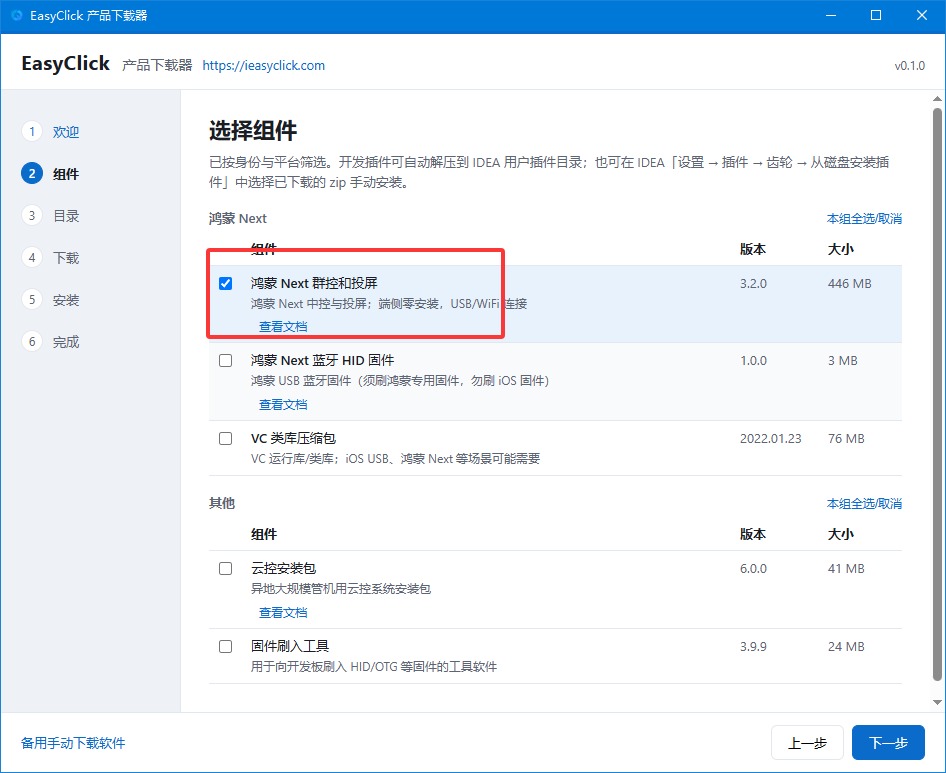
On the Components page, check:
- HarmonyOS Next cluster control & screen mirroring (required)
If the PC is missing the VC runtime and the center will not start, also check VC libraries zip.
Then click Next.
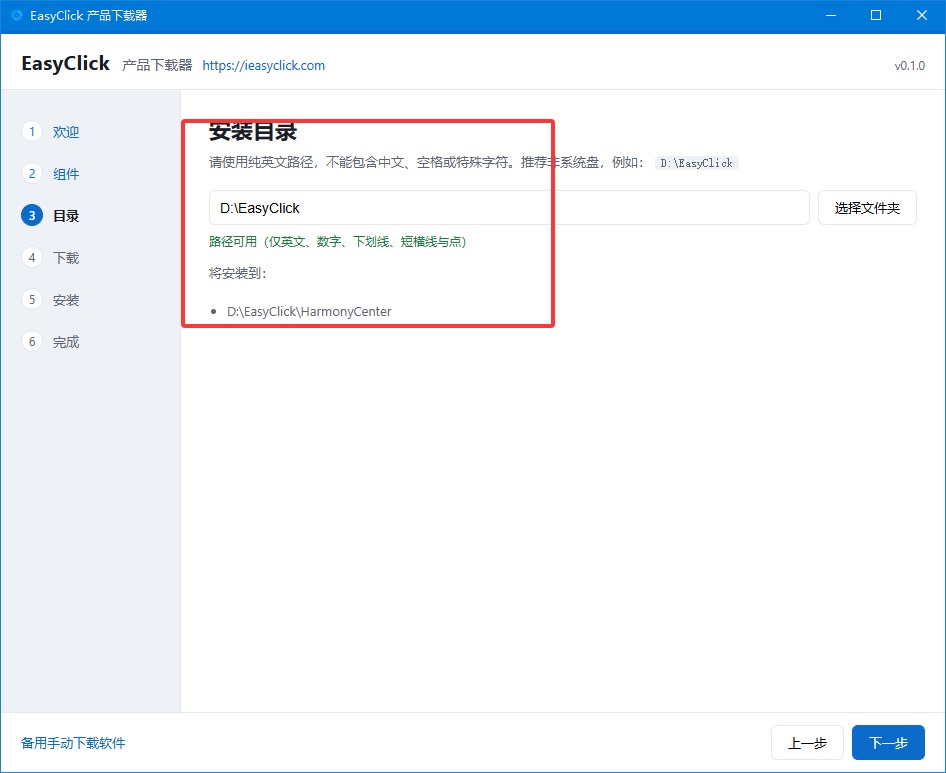
3. Choose the install directory
Use a pure English path — no Chinese, spaces, or special characters. The default like D:\EasyClick is usually fine. Confirm and click Next.
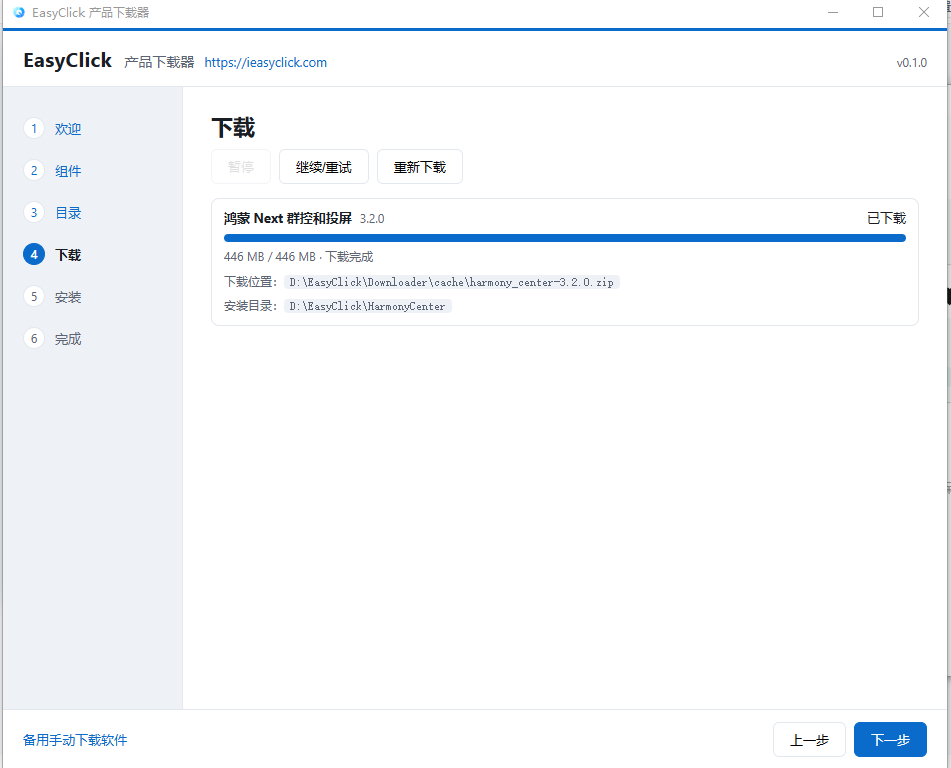
4. Wait for downloads to finish
Wait until HarmonyOS Next cluster control & screen mirroring shows Downloaded / Complete, then click Next.
5. Finish install and open the cluster folder
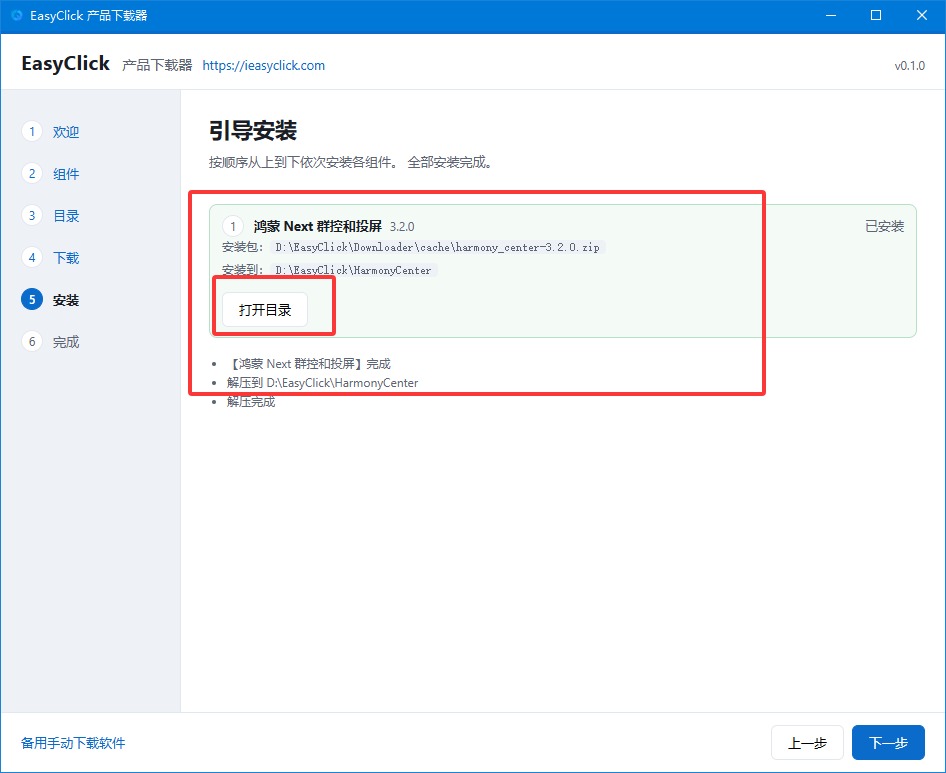
Complete the installer. On the finish page, find HarmonyOS Next cluster control & screen mirroring, then click Open folder.
6. Start the control center and sign in
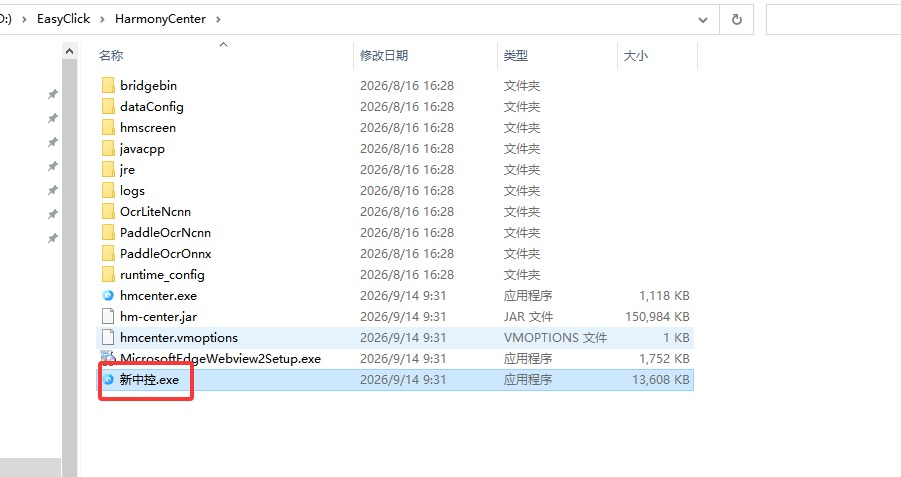
In the install folder, double-click 新中控.exe to open the control center. Register and sign in as prompted.
7. Connect the HarmonyOS device over USB
Before connecting, enable Developer Mode and USB debugging on the phone (otherwise the control center often cannot see the device and automation will not start):
- On the phone go to Settings → System / About phone, tap Build number (or Software version) repeatedly until Developer Mode is enabled
- Go to Settings → System → Developer options, turn on USB debugging
- Connect the USB cable; when prompted, tap Allow / Trust this computer for debugging
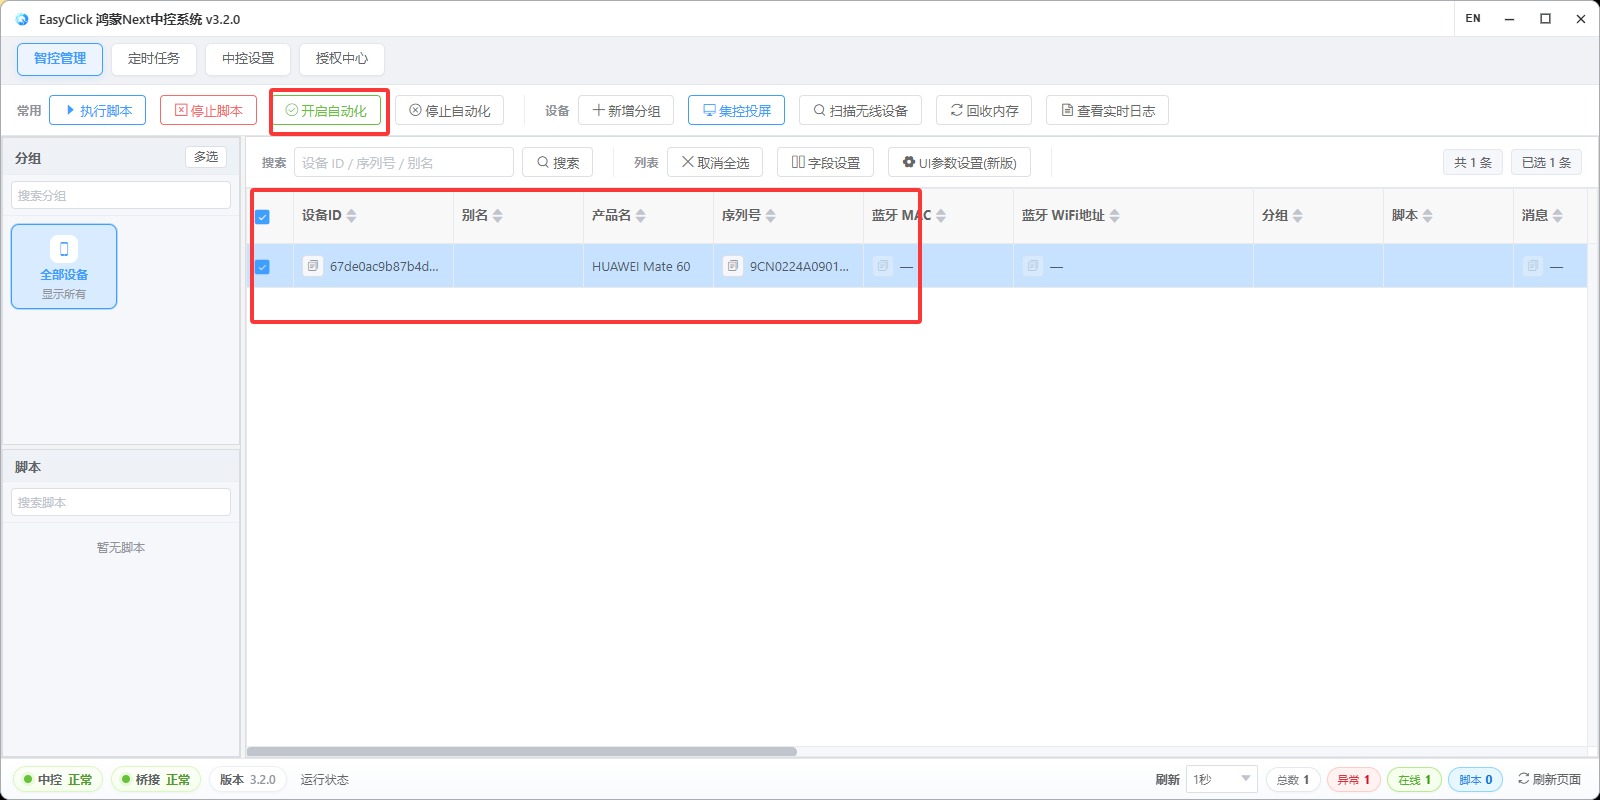
The device should appear in the control-center list — select it and click Start automation.
8. Confirm automation is running
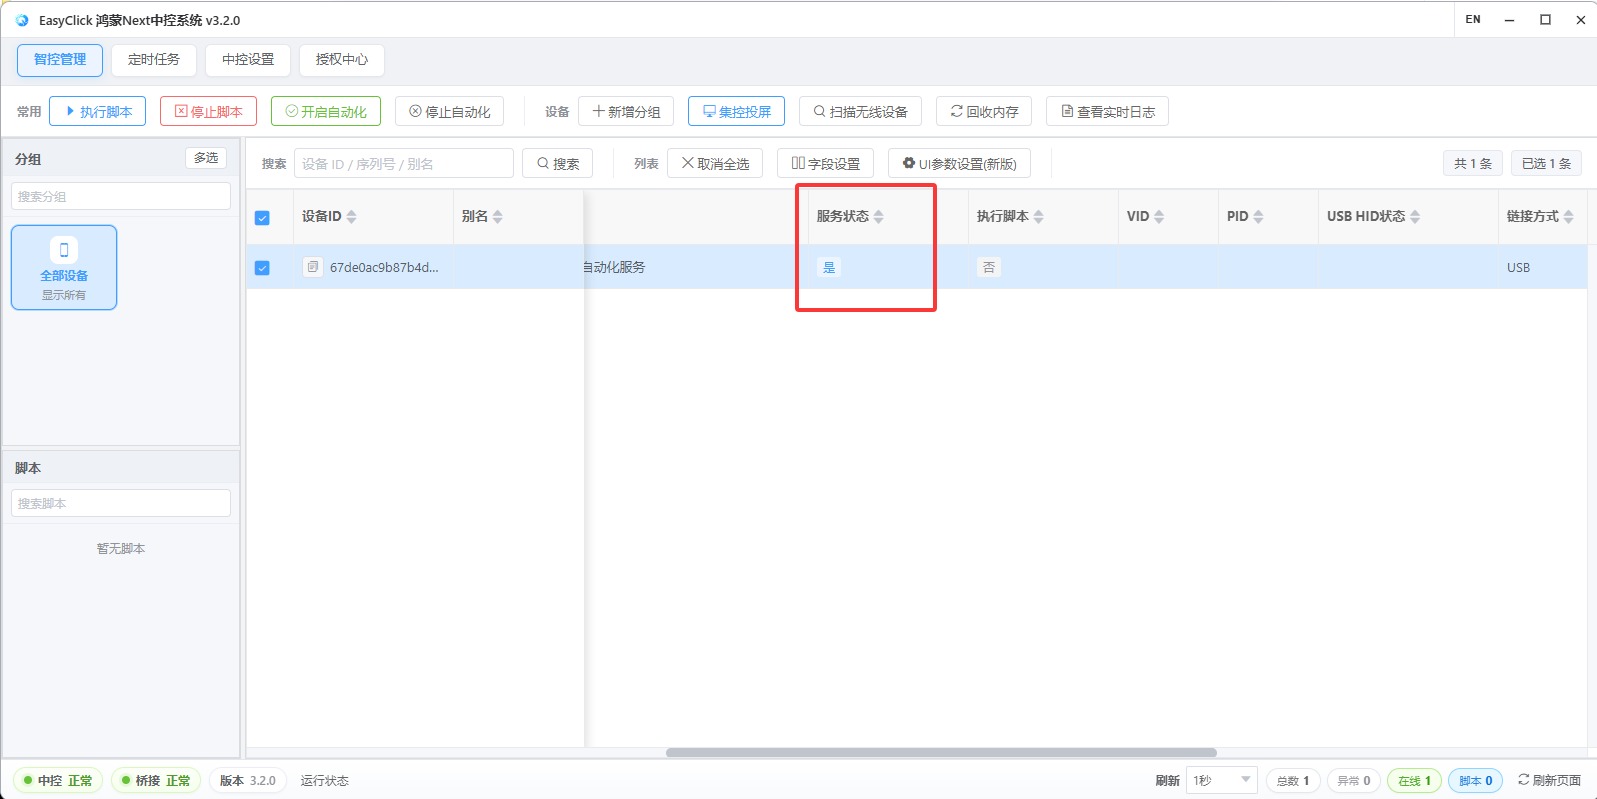
After automation starts successfully, Service status should show Yes.
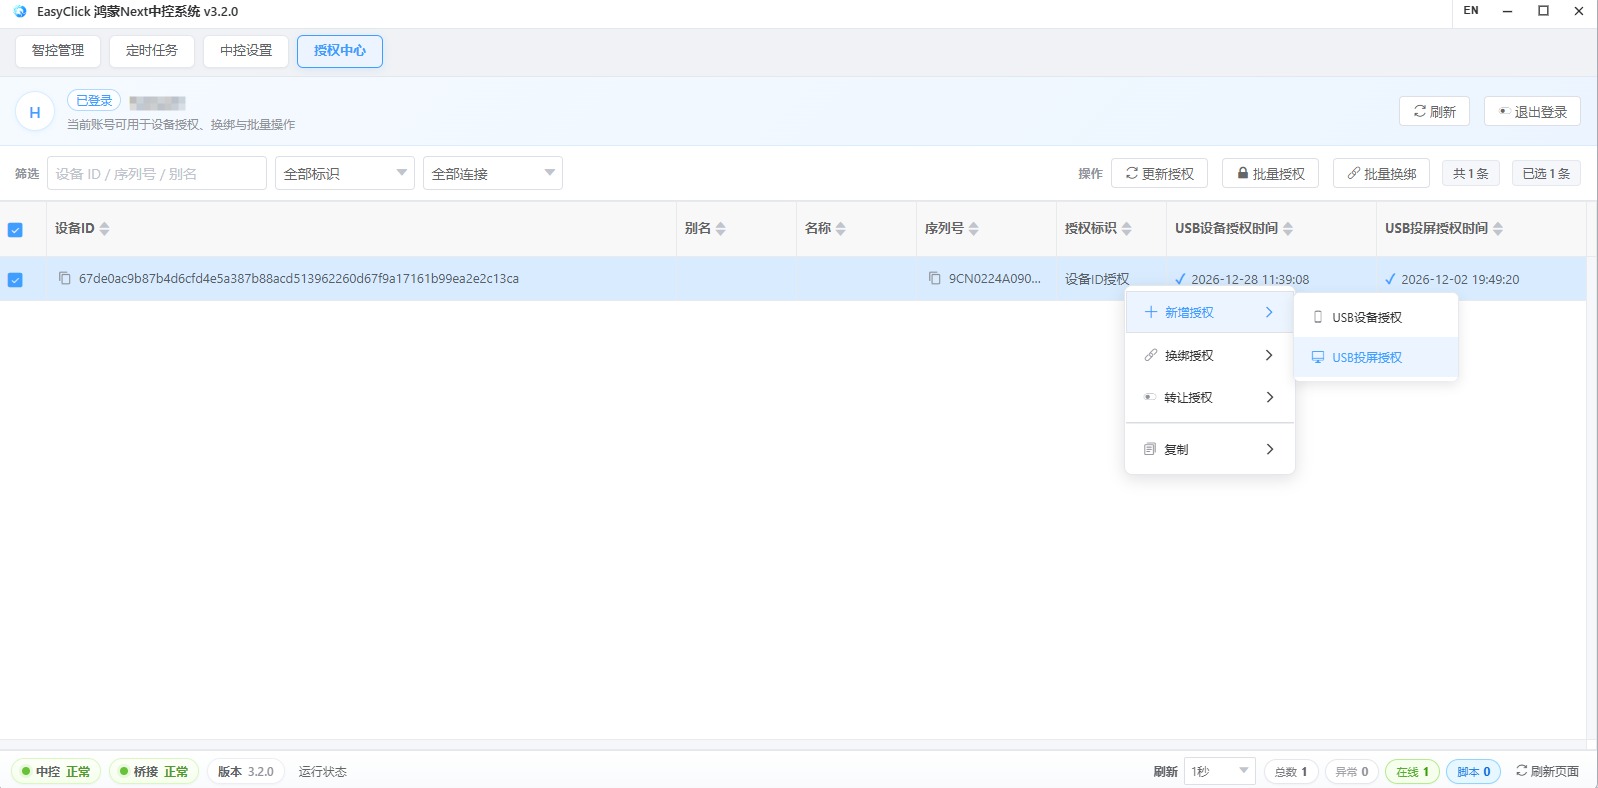
9. Purchase and bind licenses
Buy licenses from a reseller or the official team. Pick the correct license type:
- USB device license: for running scripts
- USB mirroring license: for mirroring and manual control
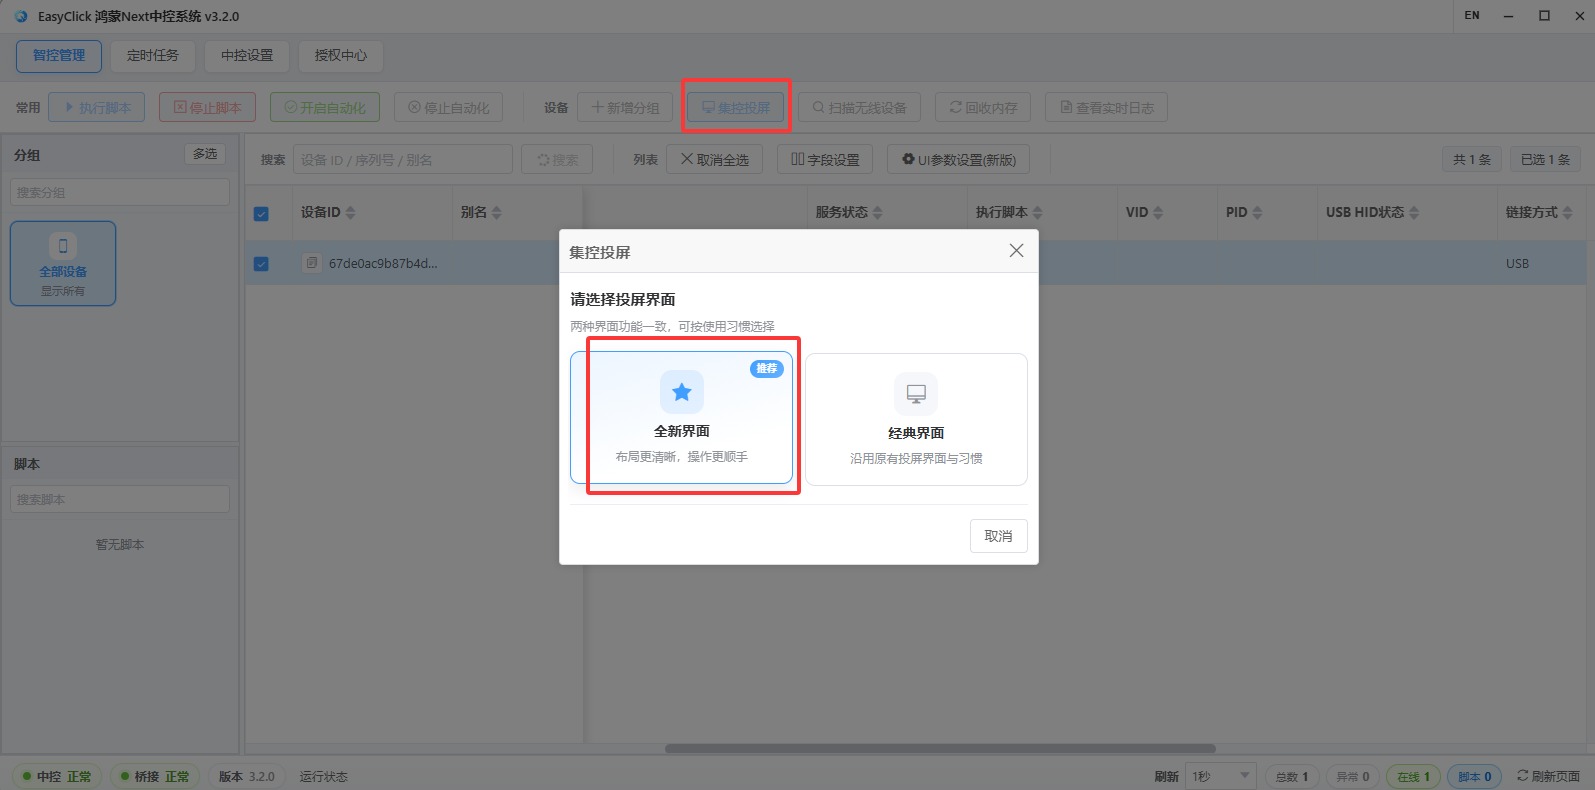
10. Open group mirroring (New UI)
In the control center, click Group screen control, choose New UI, and enter the mirroring app.
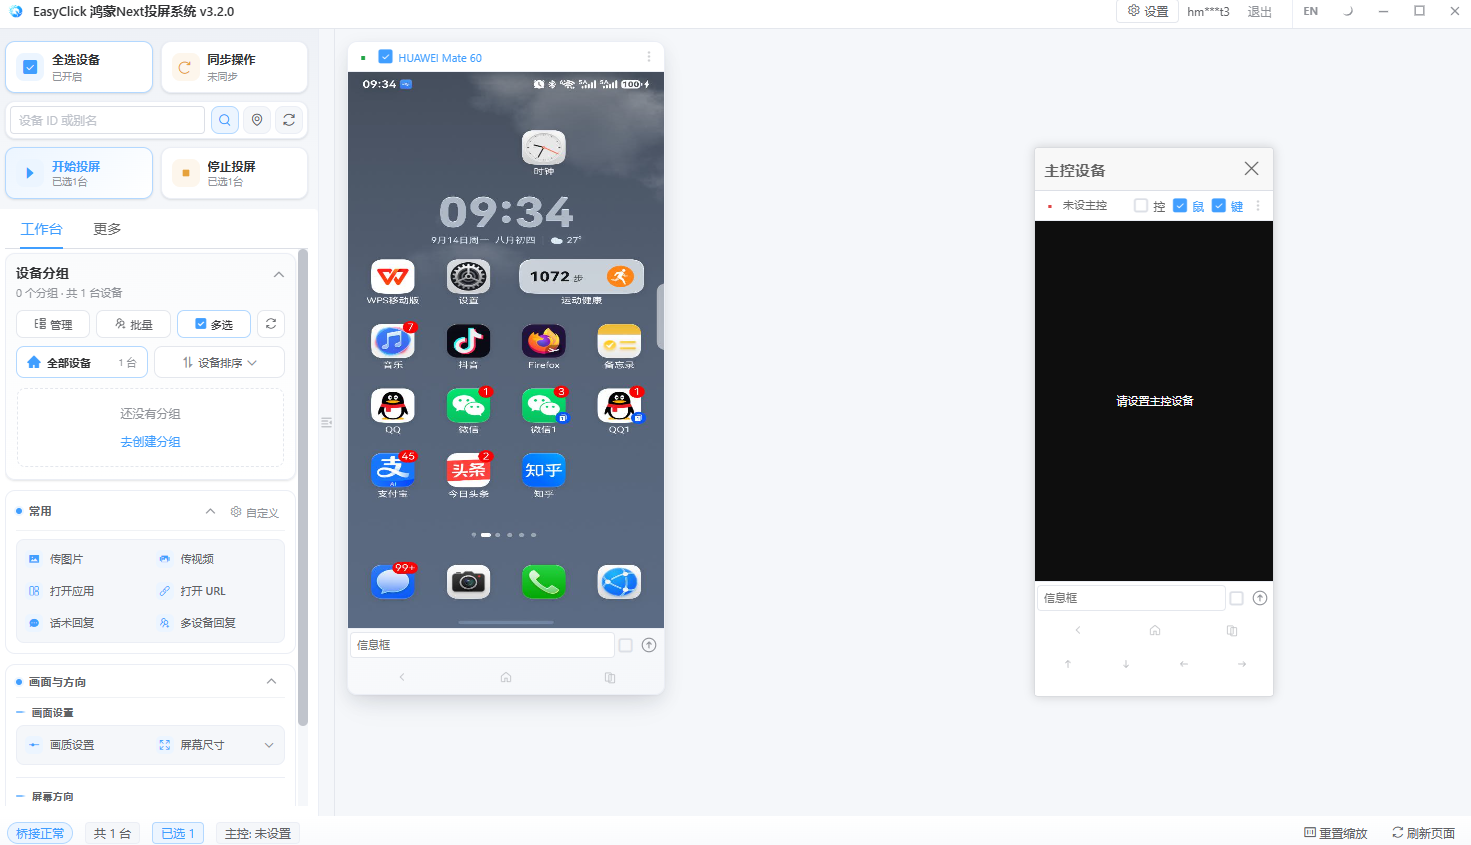
11. Start mirroring and confirm the screen
Select the device and click Start mirroring to see the HarmonyOS phone screen.
What to do next
| Goal | Where to go |
|---|---|
| Control center features | HarmonyOS USB control center |
| Mirroring operations | HarmonyOS USB mirroring |
| BLE HID | HarmonyOS BLE HID |
Common pitfalls:
- Did not check HarmonyOS Next cluster control & mirroring → incomplete install
- Install path has Chinese or spaces → reinstall to a pure English path
- Control-center status bar stays red → install VC libraries via the product downloader, then restart the PC
- Developer Mode / USB debugging off, or PC not trusted → control center cannot see the device
- Device online but service status is not Yes → click Start automation again and allow USB debugging
- Only USB device license, no USB mirroring license → scripts work but mirroring is limited
- Odd failures → restart the phone, then quit and reopen the control center